![]() Fact checked
Fact checked ![]() We have a team of smart fact checkers. They make sure our content is accurate. They use the best sources like medical journals and government websites. You can find their names and profiles on the articles they check.
We have a team of smart fact checkers. They make sure our content is accurate. They use the best sources like medical journals and government websites. You can find their names and profiles on the articles they check.

Important: This article is for informational purposes only. Please read our full disclaimer for more details.
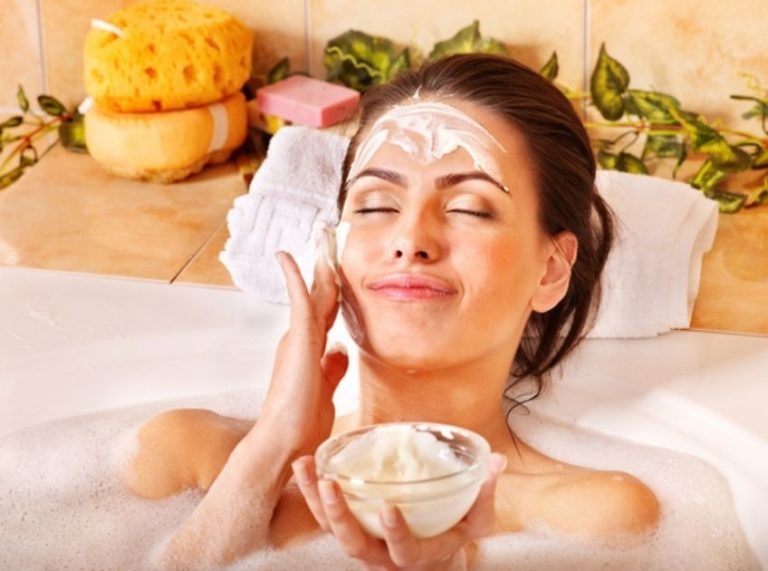
Cellulite doesn’t discriminate—most of us have it somewhere. But if you’re tired of overpriced creams and ineffective fixes, nature may be your best solution. With the right combination of essential oils and carrier oils, you can create DIY anti-cellulite massage oils that help firm, smooth, and energize your skin.
In this post, discover simple, powerful recipes using natural ingredients proven to support smoother skin.

Why Choose Anti-Cellulite Massage Oils?

DIY massage oils are more than just budget-friendly. They’re packed with active plant-based compounds that penetrate the skin and help stimulate circulation. When combined with proper massage, these oils can improve skin texture and support the body’s natural detox process (1).
Top Benefits of Using These Oils
- Boosts blood circulation
- Reduces fluid retention and puffiness
- Nourishes and hydrates the skin
- Helps tighten and tone tissue
- Enhances lymphatic drainage
The Science Behind These Natural Oils
Certain essential oils have properties that promote fat breakdown, circulation, and skin elasticity:
- Caffeine-rich oils (coffee or green tea) stimulate lipolysis (2).
- Grapefruit and juniper oils aid in detoxifying tissues and improving lymphatic flow.
- Rosemary oil has antioxidant and toning effects on the skin.
- Carrier oils like sweet almond and jojoba deeply moisturize while helping essential oils absorb better.
What Makes These Ingredients Effective
- Grapefruit Essential Oil: Contains d-limonene, which helps dissolve fat and stimulate circulation.
- Juniper Berry Oil: Known to reduce fluid retention (3)(4).
- Rosemary Oil: Improves cellular regeneration and boosts circulation.
- Sweet Almond Oil: High in vitamin E and fatty acids to nourish and soften skin.
- Jojoba Oil: Mimics skin’s natural oils and improves absorption.
When to Stop Using Them
Discontinue use if you notice:
- Skin irritation, rashes, or burning
- Sun sensitivity after applying citrus oils
- Any allergic reaction or breakouts
- Discomfort during or after a massage
Can You Adjust the Ingredients?
Absolutely. Reduce essential oil drops for sensitive skin or increase carrier oils to dilute potency. If the oil feels too heavy, mix in a lighter oil like grapeseed or jojoba. Always patch test when trying new blends.
Which Skin Types Benefit the Most?
- Normal to oily skin: Easily tolerates most essential oils
- Dry skin: Benefit from richer carrier oils like almond or olive oil
- Sensitive skin: Use fewer essential oils and do patch testing
- Avoid: Broken skin or areas with eczema/psoriasis flare-ups
Is It Safe for Everyday Use?
Yes—when properly diluted, these massage oils are safe for daily or alternate-day use. Just avoid sun exposure within 12 hours if using citrus oils (like grapefruit or lemon), which can make the skin photosensitive.
Best 3 DIY Anti-Cellulite Massage Oil Recipes
These DIY massage oils combine powerful natural ingredients that target cellulite by improving circulation, toning skin, and reducing fluid retention. Each blend is simple to make and ideal for regular use with a self-massage routine.
1. Grapefruit & Almond Detox Oil
This citrus-infused blend promotes detoxification and enhances lymphatic drainage. Grapefruit oil is rich in limonene, which may help break down fat under the skin, while almond oil delivers deep hydration and improves skin elasticity.
Ingredients
- 2 tablespoons sweet almond oil
- 10 drops of grapefruit essential oil
- 5 drops rosemary essential oil
- 1 teaspoon vitamin E oil
Directions to Use
- In a clean glass bottle (preferably dark-colored), pour in sweet almond oil.
- Add grapefruit and rosemary essential oils.
- Stir in vitamin E oil to preserve the mixture and nourish skin.
- Shake well before each use.
How to Apply
- Apply a small amount to clean, slightly damp skin after showering.
- Use circular, upward motions to massage the oil into cellulite-prone areas.
- Spend at least 5–10 minutes on a massage to stimulate lymphatic flow.
- Avoid sun exposure on applied areas for at least 12 hours due to citrus oils.
2. Coffee & Jojoba Firming Oil
This energizing blend harnesses caffeine’s skin-tightening effects. Coffee oil is known to improve circulation and reduce the appearance of dimples, while jojoba oil balances sebum production and is non-comedogenic.
Ingredients
- 2 tablespoons jojoba oil
- 1 tablespoon coffee-infused oil* (or ½ teaspoon concentrated brewed coffee oil)
- 6 drops juniper berry essential oil
- 4 drops of lemon essential oil
*To make coffee-infused oil: Steep 1 tablespoon ground coffee in ¼ cup carrier oil over low heat for 1 hour. Strain and cool.
Directions to Use
- Mix jojoba oil with coffee-infused oil in a sterile glass dropper bottle.
- Add juniper berry and lemon oils and shake well to combine.
- Store in a cool, dark place and use within 2 months.
How to Apply
- Warm the oil slightly between palms.
- Massage into thighs, buttocks, and arms using firm, circular strokes.
- Use for 5 minutes daily or alternate days.
- Let it absorb before getting dressed.
3. Rosemary & Olive Circulation Booster
This blend combines rosemary’s stimulating qualities with cypress and grapefruit for a circulation-enhancing formula. Olive oil hydrates deeply, improving texture over time.
Ingredients
- 2 tablespoons extra virgin olive oil
- 7 drops rosemary essential oil
- 5 drops of cypress essential oil
- 5 drops of grapefruit essential oil
Directions to Use
- Pour olive oil into a glass jar or bottle.
- Add rosemary, cypress, and grapefruit essential oils.
- Close tightly and shake before each use.
- Label with the date and store in a dark area.
How to Apply
- Apply after a warm shower for optimal absorption.
- Use a dry brush beforehand for improved penetration.
- Massage into skin for 7–10 minutes, focusing on hips and thighs.
- Use 3–4 times a week consistently.
Do’s and Don’ts of Anti-Cellulite Massage Oils
| Do’s | Don’ts |
|---|---|
| Do a patch test before first use | Don’t apply to broken or irritated skin |
| Use oils within 2 months | Don’t use too many essential oils at once |
| Store in a dark, cool bottle | Don’t apply before sun exposure (citrus) |
| Combine with a massage for better effects | Don’t expect instant results |
Frequently Asked Questions (FAQ’S)
1. Can I use these oils while pregnant or breastfeeding?
A. It’s best to avoid essential oils like juniper, rosemary, and grapefruit during pregnancy unless approved by a healthcare provider.
2. How soon can I expect results?
A. With consistent use, some notice smoother skin within 3–4 weeks.
3. Do I need a massage tool to apply these oils?
A. Not required, but using a massage roller or dry brush enhances penetration and improves circulation.
DIY anti-cellulite massage oils offer a safe, natural, and effective way to support smoother, firmer skin. Backed by nourishing oils and circulation-boosting botanicals, these recipes are easy to make and use at home. Pair with healthy habits and consistency for visible results, and you can feel good about it.