Important: This article is for informational purposes only. Please read our full disclaimer for more details.
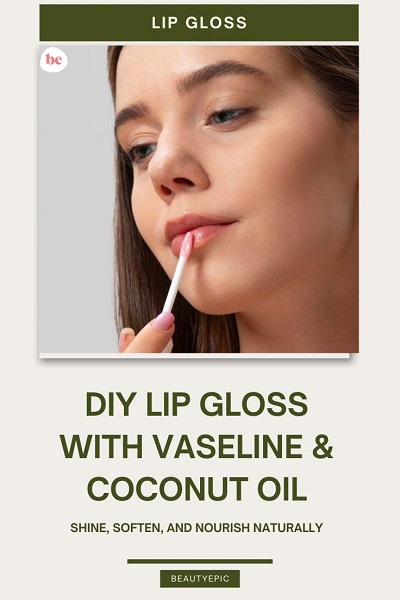
Looking for a glossy pout that also heals and hydrates? This DIY lip gloss with Vaseline and coconut oil gives you a luscious shine while deeply moisturizing cracked or dry lips. Say goodbye to store-bought formulas loaded with chemicals and hello to soft, glossy lips made at home.
Why This Gloss is a Game-Changer for Dry Lips
This combo does more than just look pretty—it works. Vaseline locks in moisture while coconut oil heals and softens. Whether you want a clear gloss or a tinted twist, this DIY delivers real results.
Benefits of Using This DIY Lip Gloss
- Provides long-lasting shine without stickiness
- Heals chapped lips with natural oils
- Contains no synthetic additives or preservatives
- Gentle enough for daily use and customizable
The Power Duo: Vaseline + Coconut Oil
These two ingredients bring unique strengths to your gloss game.
Vaseline (Petroleum Jelly)
- Forms a protective barrier to lock in moisture
- Prevents water loss and keeps lips supple
Coconut Oil (Virgin)
- Rich in fatty acids like lauric acid for healing
- Naturally antibacterial and anti-inflammatory
- Adds a subtle sheen and softens the texture
What Science Says About the Ingredients
According to a Dermatologic Therapy study (2008), petroleum jelly is one of the most effective occlusive agents for reducing transepidermal water loss (1) (2). Coconut oil has shown antimicrobial and moisturizing properties in clinical studies, making it ideal for lip care and wound healing (3).
When to Pause or Stop Using
Discontinue use if:
- You develop irritation, bumps, or a rash
- The gloss feels greasy or causes breakouts
- The scent of coconut oil becomes unpleasant (could indicate spoilage)
- You notice discoloration in the gloss over time
Tweak the Recipe to Make It Yours
- Use more coconut oil for a softer texture
- Add mica powder or lipstick scrap for color
- Include a drop of essential oil for fragrance
- Use a lip balm tube for mess-free application
Best Skin Types for This DIY
Ideal For:
- Dry or flaky lips
- Sensitive skin needs gentle care
- Normal lips need occasional hydration
Use Caution If:
- You have coconut oil sensitivity
- You’re acne-prone near the lip area
Is It Safe to Use?
Yes, both Vaseline and virgin coconut oil are safe for cosmetic use. However, always use clean tools and containers. Do a patch test if trying new additives like essential oils or tinting agents.
2 Easy DIY Lip Gloss Recipes
These recipes are simple, effective, and give you glossy lips in minutes with natural ingredients.
1. Hydrating Clear Lip Gloss
A perfect everyday gloss that glides on smoothly, giving your lips a soft shine while deeply moisturizing dry areas. Great for both day and night use.
Ingredients:
- 1 tablespoon Vaseline
- 1 teaspoon virgin coconut oil
- 1 drop peppermint or vanilla essential oil (optional)
Directions to Use:
- Scoop the Vaseline and coconut oil into a heat-safe bowl.
- Gently heat using a double boiler method until the mixture melts completely.
- Remove from heat and stir in the essential oil (if using).
- Pour the liquid gloss into a clean lip balm pot or tube. Let it cool and solidify.
How to Apply:
- Use a sanitized finger or gloss applicator
- Swipe a thin layer over clean, dry lips
- Reapply whenever your lips feel dry or dull
- Ideal as an overnight lip mask for extra hydration
Pro Tip: If you prefer a thicker consistency, reduce the coconut oil slightly. For a lighter texture, increase coconut oil by a few drops. Store in a cool, dark place to maintain freshness.
2. Tinted Lip Gloss with Natural Shine
This version adds a splash of color using safe, natural tinting options. It hydrates while giving your lips a subtle rosy glow—perfect for minimal makeup days.
Ingredients:
- 1 tablespoon Vaseline
- 1 teaspoon coconut oil
- ½ teaspoon beetroot powder (or a small piece of pink lipstick)
- Optional: 1 drop sweet orange essential oil for a fruity scent
Directions to Use:
- In a heat-safe bowl, combine Vaseline, coconut oil, and beetroot powder or lipstick.
- Gently melt the mixture using a double boiler or microwave (10-15 seconds).
- Stir until the color blends evenly and becomes smooth.
- Add essential oil if desired, mix, and pour into a small container. Let it cool fully.
How to Apply:
- Apply with a lip brush or clean finger for precise application
- Use one layer for a sheer tint or two for more depth
- Apply over lipstick to add gloss and hydration
- Great for on-the-go touch-ups
Pro Tip: Use finely sifted beetroot powder for a smooth, speckle-free finish. If using lipstick, opt for a shade that complements your natural lip color for a fresh, dewy look.
Frequently Asked Questions (FAQ’S)
1. Can I use fractionated coconut oil instead of virgin?
A. Yes, but fractionated coconut oil is lighter and offers less intense hydration.
2. How long does this DIY gloss last?
A. Store it in a cool, dry place and use within 2–3 weeks for best quality.
3. Can I wear this gloss overnight?
A. Absolutely! The ingredients work as a nighttime lip treatment, too.
Final Thoughts
DIY lip gloss with Vaseline and coconut oil is a nourishing, glossy treat your lips will thank you for. With only a few ingredients, you can make a lip gloss that’s gentle, effective, and entirely your own. Customize it, wear it daily, and enjoy soft, radiant lips—naturally.
