
Important: This article is for informational purposes only. Please read our full disclaimer for more details.
You’ve watched countless smokey eye tutorials, only to open your eyes and… nothing. The color disappears into your hood, the shape flattens, and you’re left thinking that smoky eyes just aren’t for you.
Here’s the truth: They are—you just need the right technique tailored to hooded lids.
After working with hundreds of clients with hooded eyes, this is the technique that consistently gets the “finally!” reaction. And the best part? It takes less than 10 minutes once you get the hang of it.
1. Prep & Product Selection
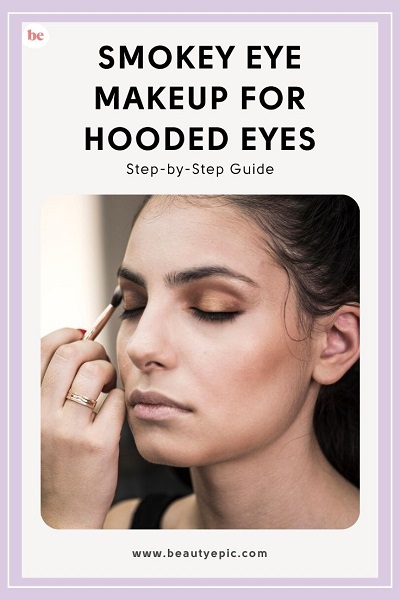
Prime with Purpose
Start by prepping your lid with an eyeshadow primer or concealer to even out tone and prevent creasing.
Why it matters: Hooded eyes naturally crease more because of lid friction. A good base keeps everything in place.
Choose Your Formula Wisely
- Liquid or cream shadows work beautifully for hooded eyes because they dry quickly and set in place.
- Go for a smudge-proof kohl or gel liner for tightlining and the smoky base.
- Use brushes that don’t overload.
Pro pick: MAC 187s duo fiber brush (buy here). Its split fibers pick up just enough pigment—perfect for layering without blotchiness.
Essential Tools
- A compact, angled, or pencil brush
- A duo-fiber blending brush
- Q-tips and micellar water for cleanup
2. The 3-Step Smokey Eye Method (Tailored for Hooded Eyes)
Step 1: Start at the Lash Line
Use a creamy pencil or shadow stick to apply a dark base along the upper lash line. Don’t worry about being precise—it will be smudged.
Why: Starting at the lash line ensures the pigment shows even when your eyes are open. The most visible area on hooded eyes is just above the lashes.
Troubleshooting Tip: Avoid starting at the crease—hooded eyes hide the crease when open, so all your work will vanish.
Step 2: Look Down & Stretch Gently
Gently stretch your eyelid upward while looking down into a mirror.
Why it works: This allows you to apply shadow over the true structure of your l, d—as it naturally sits. It prevents skipping and disappearing pigment.
Expert Tip: This technique is called “mapping beyond the anatomical crease.” It helps ensure the smokey shape is visible when your eyes are fully open.
Step 3: Build a Soft “C” on the Orbital Bone
Use your brush to blend the shadow up and outward in a sideways “C” shape.
Visual cue: Feel the bone just under your brow—that’s where your color should extend to, not the fold of skin you see in the mirror.
Common Mistake: Placing the outer corner shade too low drags the eyes down. Always lift slightly toward the tail of the brow.
3. Advanced Refinement: Shape & Layer Like a Pro
Layer Light to Dark
Start with a taupe or mid-brown transition shade over the orbital bone. Add depth gradually by layering darker tones.
Why it matters: On hooded eyes, layering prevents harsh lines and gives the illusion of depth without heaviness.
Define with Tightlining
Use a waterproof pencil to tightline the upper waterline. Wiggle the pencil between lashes to make the base look fuller.
Avoid: Thick winged liner. It eats up valuable lid space. Instead, try a short outward flick using eyeshadow for a soft lift.
4. Finishing Touches: Lashes, Clean-Up & Customization
Lift with Mascara or Natural Falsies
Use a curling mascara or lightweight false lashes that lift rather than weigh down the eyes.
Pro Tip: Focus mascara on the center and outer lashes to enhance the lifted illusion.
Clean Up Strategically
Use a Q-tip dipped in micellar water to clean the outer edge and sharpen your lifted “C” shape.
Optional Add-Ons
- Inner corner shimmer to brighten
- Nude liner on the waterline to open the eyes
Bonus Tips & Variations
- Time expectation: Once you practice 1–2 times, this full look takes 5–7 minutes.
- Shade swaps: Use soft bronze for daytime, burgundy for fall, charcoal for glam nights—the technique stays the same.
- Eye shape lift hack: Angle your outer shadow up towards the brow tail to fake a natural lift.
Wrap-Up: You Cly Wear a Smokey Eye
If you’ve felt left out of the smokey eye club because of hooded lids, now you have the key. This isn’t about trends—it’s about technique. By adjusting your placement, working with your structure, and blending smartly, you’ll unlock a timeless eye look that’s both sultry and sophisticated.


