Important: This article is for informational purposes only. Please read our full disclaimer for more details.
Looking for a timeless glam look that turns heads at every event? A classic golden glitter eye makeup never goes out of style. It’s bold yet elegant, versatile enough for weddings, parties, and festive nights out. With the right blend of shimmer, definition, and blending skills, this look can elevate your entire appearance.
This tutorial breaks down everything from prepping the lids to applying the perfect winged liner and adding that sparkling golden touch. Whether you’re a beginner or a makeup lover, this guide will help you achieve golden perfection with ease.
Product Checklist – What You’ll Need
- Eyeshadow Primer or Concealer (Buy Here)
- Matte Transition Shades (warm brown, soft orange) (Buy Here)
- Metallic Gold Eyeshadow (Buy Here)
- Glitter Glue or Adhesive Base (Buy Here)
- Loose Gold Glitter or Liquid Glitter Eyeshadow(Buy Here)
- Black Gel or Liquid Eyeliner (Buy Here)
- Neutral Matte Shades for Lower Lash Line (Buy Here)
- Champagne Inner Corner Highlight (Buy Here)
- Volumizing Mascara (Buy Here)
- False Lashes (optional) (Buy Here)
- Concealer & Setting Powder (Buy Here)
- Highlighter for Brow Bone (Buy Here)
Step 1: Prep and Prime Like a Pro
Set the Stage for a Flawless Look
Before diving into shimmer and glitter, prime your eyelids to ensure long-lasting wear and vibrant color payoff.
- Use a dedicated eyeshadow primer or concealer to create a smooth, even-toned base.
- Blend it out evenly with a flat brush or your fingertips.
- Set with a translucent powder if you have oily lids.
Pro Tip: For glitter-heavy looks, opt for a tacky base or glitter glue where you’ll be applying the shimmer. It keeps everything in place and prevents fallout.
Step 2: Create the Golden Base
Lay Down the Glam Foundation
Start with a warm neutral transition shade in the crease to build depth. Choose a matte light brown or soft orange tone depending on your skin tone.
- Blend it back and forth with a fluffy crease brush.
- Deepen the outer corner using a deeper brown or bronze matte for extra dimension.
- Then, pack on a metallic gold shadow on the center and inner part of your eyelid using a flat shader brush or your finger.
Expert Note: Using your finger can give a stronger metallic finish. Try a gold shade that flatters your undertone—champagne gold for fair skin, true gold for medium, and antique gold for deeper tones.
Step 3: Add the Glitter Glow
Make Your Eyes Sparkle
Time to turn up the glamour with golden glitter. Choose a cosmetic-grade glitter or glitter-infused liquid eyeshadow for easier application.
- Apply glitter glue or a glitter base onto the gold area of your eyelid.
- Press the glitter gently onto your lid using a flat synthetic brush or your fingertip.
Keep the glitter concentrated on the center and inner part of the lid to catch the light and brighten your eyes.
Step 4: Define With Precision
Wing It Like a Classic Queen
A golden glitter eye pairs beautifully with bold black liner.
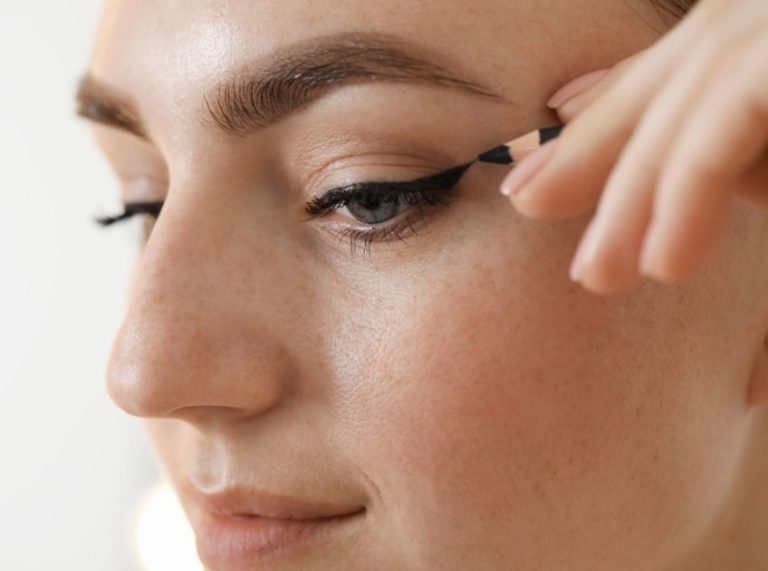
- Use a gel or liquid eyeliner to create a precise wing.
- Start thin at the inner corner and gradually thicken the line towards the outer edge.
- Extend the wing in line with your lower lash line for a sharp, lifted look.
If you struggle with winged liner, try using eyeshadow tape or a guide to get a clean, angled flick.
Step 5: Smoke Out the Lower Lash Line
Balance the Look with Subtle Definition
Add depth and definition to your lower lash line without making it too dramatic.
- Use a pencil brush to smudge a warm brown or bronze shade underneath your eyes.
- If you want a sultry look, lightly blend in some black eyeshadow near the outer third.
- Highlight the inner corner with a champagne shimmer or pale gold for a wide-eyed effect.
Step 6: Amp Up the Lashes
Bold Lashes = Instant Glam
This look calls for lashes that can match the sparkle.
- Curl your lashes and apply a volumizing and lengthening mascara to your top and bottom lashes.
- For added drama, apply a pair of wispy or 3D faux mink lashes.
Choose lashes that complement your eye shape—longer at the ends for almond eyes or rounded ones for a wide-eyed effect.
Step 7: Clean and Brighten
Perfect the Final Touches
Clean up any glitter fallout with tape or a makeup wipe. Then, brighten under the eyes:
- Apply a lightweight concealer in a triangle shape beneath your eyes.
- Blend with a damp sponge for a smooth finish.
- Set with a finely-milled translucent powder to prevent creasing.
Finish with a highlighter on the brow bone to lift the look and tie in the shimmer.
Frequently Asked Questions (FAQ’S)
1. Can I wear glitter during the day?
A. Absolutely! Use finer shimmer or glitter-infused shadows for a subtle daytime sparkle.
2. How do I avoid glitter fallout?
A. Always use a glitter primer and press (don’t swipe) the glitter into place.
3. What if I don’t own glitter?
A. Use a high-shine gold metallic eyeshadow or a gold liquid shimmer—same glow, less mess.
Let me know if you try this look and tag me in your recreations!
Final Thoughts
A classic golden glitter eye is the ultimate statement look—it’s festive, flattering, and fun. The best part? It works on every skin tone and eye shape. Whether you’re hitting a holiday party or a glam night out, this eye makeup will have you glowing with confidence.
Want to pair this look with the perfect nude lip or bold red pout? Stay tuned—I’ve got a complete glam face tutorial coming up next!

