Important: This article is for informational purposes only. Please read our full disclaimer for more details.
Are you tired of layering mascara every day or dealing with expensive lash tinting appointments? Try natural, homemade eyelash tints that darken your lashes without harsh chemicals. These DIY recipes are budget-friendly, easy to make, and safe for delicate lash hairs. Get ready to flaunt bold lashes naturally!
Why Go Natural? The Real Benefits of Homemade Eyelash Tint
- Avoids chemical dyes that may irritate sensitive eyes
- Enhances your natural lash color over time
- Strengthens lashes with nourishing ingredients
- Cost-effective and customizable to your lash tone
Ingredient Breakdown: How Nature Tints and Strengthens Lashes
- Activated Charcoal – Rich in deep pigment, perfect for black or dark brown tint.
- Black Tea – Contains tannins that temporarily stain hair strands.
- Henna – A natural dye from Lawsonia inermis that offers a long-lasting tint.
- Castor Oil – Promotes lash growth and adds sheen.
- Cocoa Powder – Offers a warm brown tint, suitable for lighter lashes.
What Makes These Ingredients Effective? The Science Speaks
- Black Tea: Rich in tannic acid, which binds to keratin in hair and offers semi-permanent tinting (1).
- Henna: Lawsone (the active dye) binds with proteins in hair, giving a reddish-brown stain (2).
- Castor Oil: Contains ricinoleic acid, which may support follicle health and boost lash density (3).
Stop If You Notice These Signs
Discontinue use if you experience:
- Redness or burning near the lash line
- Swelling of the eyelids
- Unusual lash shedding
- Any signs of eye infection
Customize to Match Your Lash Goals
- Want darker results? Increase the amount of activated charcoal or black tea.
- Prefer a subtle tint? Use more cocoa powder and reduce the amount of black tea.
- For longer wear, let the tint sit for a longer period and reapply it weekly.
Is This Right for Your Skin Type?
These DIY recipes are generally safe for:
- Normal to sensitive skin, when patch-tested
- Dry skin types, thanks to the moisturizing oils
- Oily skin may need to reduce oil-based ingredients to prevent buildup
Always do a patch test before using near eyes.
Is It Safe to Use Homemade Lash Tints?
Yes, if used cautiously and ingredients are patch-tested. Use sterilized tools, avoid getting tint in your eyes, and apply sparingly to the lash hairs only. Never tint if you have active eye infections or allergies to any listed ingredients.
Top 3 DIY Eyelash Tint Recipes
1. Bold Black Lash Tint with Activated Charcoal
This DIY tint is perfect for darkening lashes naturally, especially if you love the look of mascara but want a chemical-free option.
Ingredients
- 1 teaspoon activated charcoal powder (fine, cosmetic-grade)
- ½ teaspoon aloe vera gel (soothing and helps bind the tint)
- ¼ teaspoon cold-pressed castor oil (strengthens and nourishes lashes)
- 1 drop vitamin E oil (optional for added lash conditioning)
Directions
- In a small bowl, mix activated charcoal and aloe vera gel until you get a smooth, thick paste.
- Add castor oil and vitamin E oil and stir well.
- Ensure the paste is not runny to avoid it dripping into your eyes.
- Transfer into a small sterile container if storing for future use (keep refrigerated).
How to Apply
- Clean your lashes with a gentle cleanser or micellar water.
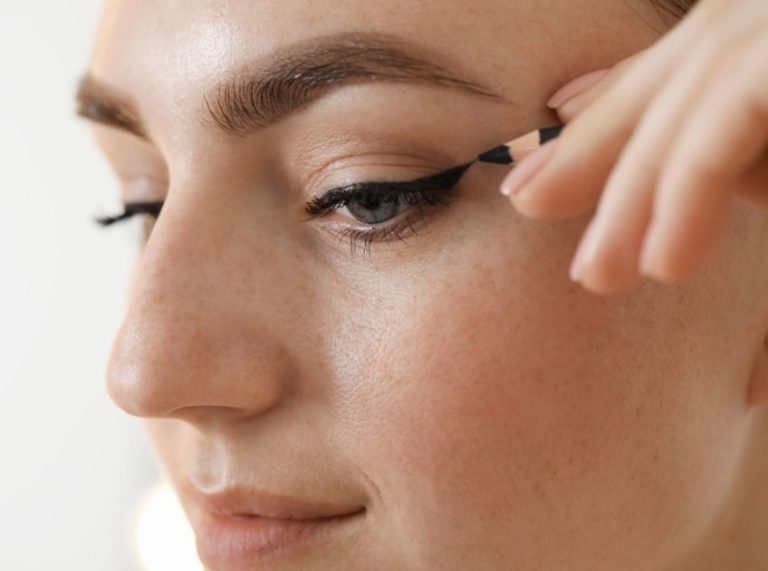
- Dip a clean spoolie or eyeliner brush into the mixture.
- Carefully brush the tint onto your upper and lower lashes.
- Let it sit for 10–15 minutes, avoiding any eye movement.
- Gently wipe with a damp cotton pad and rinse with lukewarm water.
Pro Tip
Apply petroleum jelly on your eyelids and under-eye area before tinting to prevent staining your skin.
2. Gentle Brown Tint with Cocoa & Black Tea
Best for light or red-toned lashes, this soft brown tint gives your lashes a warm, natural hue while conditioning them.
Ingredients
- 2 tablespoons strong brewed black tea (high in tannins for staining)
- ½ teaspoon unsweetened cocoa powder (adds rich brown color)
- ¼ teaspoon raw honey (natural binder and antimicrobial)
- ½ teaspoon aloe vera gel (optional for a smoother texture)
Directions
- Brew a cup of strong black tea and let it cool completely.
- In a bowl, mix cocoa powder and honey into a paste.
- Add 2 teaspoons of the cooled tea and aloe vera gel. Mix well until smooth.
- Adjust thickness by adding more tea or cocoa as needed.
How to Apply
- Make sure your lashes are free from oil and makeup.
- Use a clean eyeliner brush or cotton swab to apply the mixture to your lashes.
- Leave on for 15–20 minutes for deeper staining.
- Wipe clean using a damp cloth and rinse off excess with warm water.
Pro Tip
Use daily for a week for a gradual tint build-up that mimics semi-permanent lash dye.
3. Long-Lasting Henna Lash Tint
Henna offers a longer-lasting tint compared to other DIYs, with natural conditioning benefits for lash strands.
Ingredients
- 1 teaspoon natural henna powder (body-art quality, free from chemicals)
- ½ teaspoon black tea (brewed and cooled)
- 1 drop fresh lemon juice (helps activate henna dye)
- ¼ teaspoon glycerin (optional, for added moisture)
Directions
- Mix henna powder with cooled black tea to form a thick paste.
- Add lemon juice and glycerin, then stir well.
- Let the paste sit covered for at least 1 hour to release dye.
- Stir again before applying.
How to Apply
- Protect the skin around your eyes with petroleum jelly.
- Use a cotton swab or fine eyeliner brush to carefully apply the paste to your lashes.
- Avoid getting any paste on the waterline or inside the eyes.
- Leave it on for 10 minutes only, then gently remove with a wet cotton pad.
Pro Tip
Don’t leave henna on too long—it can stain the skin around your eyes. Stick to 10 minutes max.
Expert Tips for Gorgeous Lashes
- Always patch test before first-time use
- Use disposable applicators to avoid contamination
- For best results, clean lashes thoroughly before tinting
- Store leftovers in the fridge (max 3 days)
Do’s and Don’ts of Eyelash Tinting
| Do’s | Don’ts |
|---|---|
| Patch test every new mix | Skip hygiene steps |
| Use only clean tools | Apply too close to the eyelid |
| Let mixtures cool before use | Use store-bought henna with chemicals |
| Wipe off gently with cotton | Rub your eyes during application |
Frequently Asked Questions (FAQ’S)
1. How long does homemade eyelash tint last?
A. Most tints last 3–5 days, with henna lasting up to a week, depending on lash type and aftercare.
2. Can I use these recipes on eyebrows too?
A. Yes, they are gentle and effective for brows, just ensure precise application.
3. Are these tints safe during pregnancy?
A. Generally, yes—if patch-tested and no strong essential oils are used. Always consult your doctor first.
Homemade eyelash tints are a safe, customizable, and natural way to enhance your lashes. Whether you want dramatic black or subtle brown, these DIYs give you control over what goes near your eyes. Try one of these recipes today and wake up to naturally defined lashes!

