
Important: This article is for informational purposes only. Please read our full disclaimer for more details.
A winged eyeliner can elevate any makeup look, making your eyes appear lifted, defined, and ultra-polished. But if your wings never match or your lines always smudge, you’re not alone. Creating the perfect flick might seem like a challenge, but with the right steps, tools, and a little patience, anyone can master it.
Here’s a simple, expert-backed 3-step routine that will take the guesswork out of applying winged eyeliner—no shaky hands, no frustration.
Step 1: Map Out Your Wing – Create the Perfect Angle
Before you even touch your eyeliner, mapping your wing is the foundation of success. This helps you place your flick exactly where it flatters your eyes most.
Here’s how to do it:
- Take a thin makeup brush, pencil, or the handle of your eyeliner, and angle it from the outer corner of your nose to the outer edge of your brow. This gives you the most natural lift.
- Use a brown pencil or light eyeshadow to lightly draw a guideline at that angle.
- Make sure to step back and look at both eyes. Wings should be mirrored in angle and length—this is key to symmetry.
For hooded eyes: Keep your eyes open while mapping the wing. Draw the wing slightly above the fold so it remains visible when your eyes are open.
Pro Tip: Look straight into a mirror while mapping instead of tilting your head down. This helps place the wing in your eye’s natural shape and ensures it won’t disappear into the crease.
Step 2: Line Your Lash Line – Build the Base First
Once you’ve mapped your wing, it’s time to draw the base liner across your upper lid. This helps anchor your wing and makes the finished look more cohesive.
Here’s what to do
- Start from the center of your lash line and draw short, connected strokes toward the outer corner. Use a pen liner or fine-tip brush for precision.
- Then go back and complete the line from the inner corner to the center, connecting smoothly.
- Stay as close to the lash line as possible to avoid harsh gaps.
- If you want a more dramatic look, thicken the line slightly as you go outward—but keep it thin near the inner corner.
Beginner’s Tip: Sketch your line in small strokes or dashes rather than one sweeping line. This gives you more control and makes corrections easier.
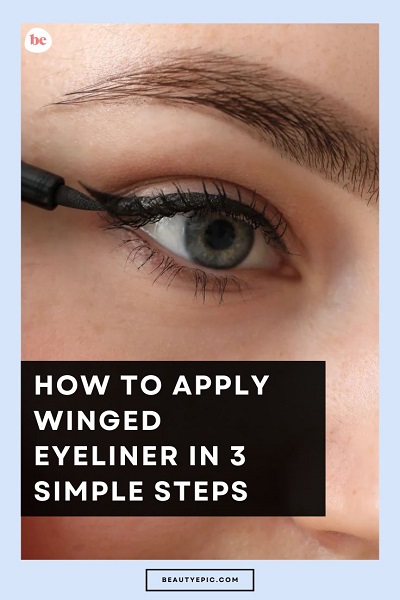
Step 3: Flick and Fill – Define the Wing
Now the fun part: drawing the actual wing! This step can be intimidating, but once you’ve mapped and lined your eyes, creating the flick becomes surprisingly easy.
Here’s how to do it right:
- Start at the outer corner of your eye and follow the guideline you created in Step 1. Draw a small angled line outward and slightly upward—this is the wing’s “tail.”
- Connect the tip of that tail back toward the lash line, forming a small triangle.
- Fill in the triangle completely. Blend where the wing meets the lash line for a seamless transition.
Want a softer or more dramatic wing? Adjust the length and thickness of the tail. Keep it short and sharp for everyday, or extend it farther out for bold glam.
Fixing Mistakes: If your wing smudges or looks uneven, dip a flat brush or cotton swab in micellar water or concealer to sharpen the edges.
Bonus Tip: After filling in your wing, let it dry completely before blinking—this prevents transfer onto your upper lid.
Common Beginner Mistakes—and How to Fix Them
Even the pros mess up their eyeliner. Here are a few tips to rescue your look:
- Crooked wings? Use a piece of tape angled from the corner of your eye to your brow to trace along. Peel it off for a crisp finish.
- Shaky hands? Steady your elbow on a table, and rest your pinky on your cheek as an anchor.
- Eyeliner smudging by midday? Use a waterproof formula and lightly dust translucent powder on your lid before applying eyeliner.
Final Thoughts: Practice Makes the Wing Perfect
Winged eyeliner isn’t about perfection—it’s about persistence. With this 3-step method, you’ll avoid the common pitfalls and gain more confidence every time you try. Whether you’re heading to work or prepping for a night out, a sharp, symmetrical wing will always pull your look together.


