Important: This article is for informational purposes only. Please read our full disclaimer for more details.
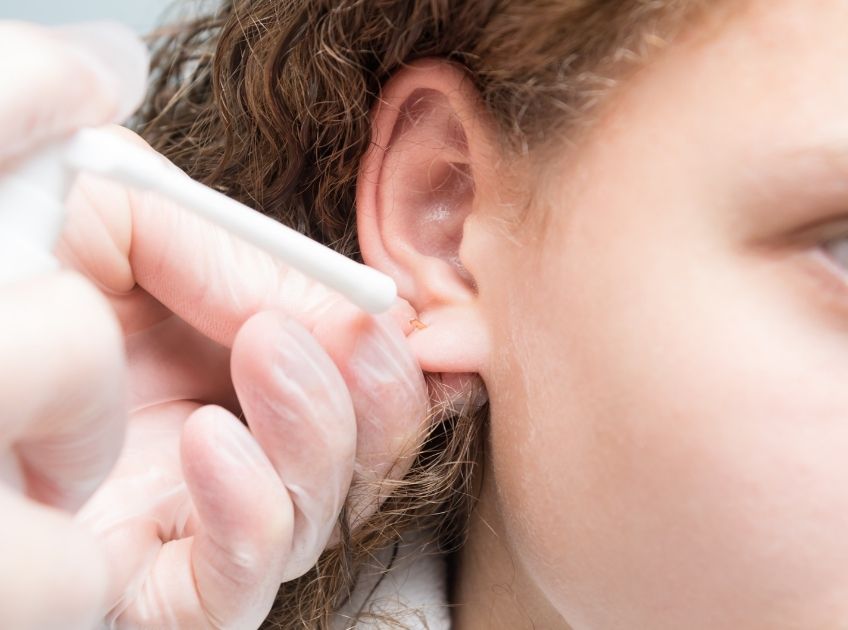
An ear piercing is more than just a style statement — it’s a small wound that needs time and care to heal. Whether it’s your first lobe piercing or a trendy cartilage one, how you clean and care for it determines how quickly and safely it heals. Improper cleaning can lead to redness, swelling, or even infection, while the right routine keeps your piercing looking beautiful and irritation-free.
In this guide, we’ll walk you through everything you need to know — from pre-piercing prep to daily cleaning, healing timelines, and when to change your jewelry — all backed by expert insight and evidence-based advice.
Before the Piercing: Smart Prep for a Healthy Start
Before you get pierced, preparing your skin and choosing a professional piercer are just as important as the aftercare routine.
Tips to Prepare:
- Choose a certified professional: Avoid at-home piercings. Licensed piercers use sterile tools and high-quality jewelry to minimize infection risk.
- Go for hypoallergenic metals: Opt for surgical steel, titanium, or 14k gold to reduce allergic reactions.
- Avoid alcohol and caffeine: Both can thin your blood slightly, which may increase bleeding during piercing.
- Clean your ears beforehand: Wash the area with mild soap and water before your appointment.
A study in the Journal of Clinical and Aesthetic Dermatology (2019) notes that sterile technique and appropriate jewelry material dramatically reduce post-piercing complications.
10 Proven Tips for Cleaning Your Ear Piercing
Proper aftercare is the key to a smooth, infection-free healing journey. A well-cleaned piercing not only heals faster but also keeps your jewelry shining and your skin healthy. Below are 10 expert-approved tips to help you maintain your piercing the right way — safely, gently, and effectively.
1. Always Start with Clean Hands
Before touching your ear piercing — whether to clean, adjust, or check it — make sure your hands are freshly washed. Your hands naturally carry oils, dirt, and bacteria that can irritate a new piercing and lead to infection.
How to do it properly:
- Wash your hands with warm water and antibacterial soap for at least 20 seconds.
- Rinse and dry with a clean towel or paper tissue.
- Avoid touching your piercing unnecessarily throughout the day.
Science Insight: According to the American Academy of Dermatology (AAD), bacteria from unwashed hands are one of the leading causes of ear piercing infections (1)(2).
2. Clean Gently with a Sterile Saline Solution
The saline soak is the gold standard for piercing aftercare. It removes dirt, dried discharge, and bacteria without harming the delicate tissue.
How to Use Saline Solution:
- Mix ¼ teaspoon of non-iodized sea salt in 1 cup of warm distilled or boiled (then cooled) water.
- Dip a sterile cotton pad or gauze into the solution.
- Gently press against the piercing for 5–10 minutes.
- Allow to air dry — avoid using tissues or towels that can harbor germs.
Alternative: Use a pre-made sterile saline wound wash available at pharmacies.
Frequency: Twice daily for the first 6–8 weeks.
Science Fact: The Journal of Wound Care (2018) found that saline maintains a balanced pH environment and promotes faster tissue regeneration by preventing bacterial overgrowth (3).
3. Don’t Twist, Spin, or Move the Jewelry
A common myth suggests that rotating the earring helps it “stay open.” In reality, twisting can tear newly forming tissue and delay healing.
Why you Shouldn’t Twist:
- It causes micro-tears, increasing the risk of infection.
- It introduces dirt or bacteria into the wound.
- It disrupts the natural healing process.
What to do instead: Clean around the jewelry gently and let it remain in place until fully healed.
4. Remove Crusts Gently — Don’t Pick Them
A thin crust around your piercing is normal and part of the healing process. Picking it off with fingers or nails can cause irritation or bleeding.
How to Clean Crusts:
- Soak a cotton pad in warm saline and place it on the crusted area for a few minutes.
- Once softened, gently wipe away the debris.
- Repeat as needed, but never force it off.
Tip: Mild, clear, or white discharge is normal; yellow, green, or foul-smelling discharge is not — it could indicate infection.
5. Keep Hair, Headphones, and Accessories Away
Your piercing needs space to breathe. Hair, earbuds, and even tight clothing collars can introduce bacteria or snag jewelry, causing trauma.
Care Tips:
- Tie your hair back or secure it away from your ears, especially while cleaning or sleeping.
- Avoid using earbuds or over-ear headphones during the healing phase.
- Be cautious with scarves, hats, or face masks that brush against your ears.
6. Change Pillowcases and Bedding Regularly
Even freshly washed ears can get irritated by dirty bedding. Oils, dead skin cells, and sweat on pillowcases can easily contaminate a new piercing.
How to Maintain Hygiene:
- Change pillowcases every 2–3 days during the first few weeks.
- Use clean, breathable cotton fabrics that don’t trap moisture.
- Sleep on the opposite side of your piercing, or use a donut-style travel pillow to relieve pressure.
7. Avoid Pools, Hot Tubs, and Lakes During Healing
While it’s tempting to take a dip, water in pools, lakes, and hot tubs can contain harmful bacteria and chlorine that irritate or infect new piercings.
Best Practices:
- Wait at least 6–8 weeks for earlobe piercings and 3–6 months for cartilage piercings before swimming.
- If unavoidable, apply a waterproof bandage and clean the area with saline immediately afterward.
Study Note: Research in Environmental Health Perspectives (2017) showed that public pool and hot tub water can harbor bacteria such as Pseudomonas aeruginosa, commonly linked to skin infections (4).
8. Stick to a Consistent Cleaning Routine
Consistency is key — cleaning too little invites bacteria, but cleaning too often can cause dryness and irritation.
Balanced Routine:
- Clean twice a day (morning and evening).
- Avoid over-cleaning — once the area feels dry or sore, scale back to once daily.
- Keep your piercing dry between cleanings; moisture trapped behind jewelry can breed bacteria.
Pro tip: If you exercise or sweat heavily, rinse the area with saline immediately afterward to remove sweat and oils.
9. Support Healing from the Inside Out
A strong immune system helps your body heal faster. Your diet and hydration levels play a crucial role in tissue repair.
What to Include in Your Diet:
- Vitamin C (citrus, kiwi, bell peppers) – supports collagen formation.
- Zinc (nuts, seeds, chickpeas) – boosts immunity.
- Protein (eggs, tofu, chicken) – aids in tissue growth and repair.
- Plenty of water – helps flush toxins and keep skin hydrated.
Avoid: Excessive sugar, alcohol, and caffeine, which can slow healing and increase inflammation.
10. Avoid Makeup, Lotions, and Harsh Chemicals Near the Piercing
Products like perfumes, hairsprays, and facial creams can clog pores or irritate a healing piercing.
Safety Measures:
- Apply skincare products at least 1 inch away from the piercing.
- Use unscented, hypoallergenic products near the area.
- Avoid alcohol wipes or hydrogen peroxide — they can damage new tissue.
Science Insight: Dermatologists warn that overly harsh cleansers strip the skin of natural oils, making it more prone to irritation and scarring (5).
How Long Does It Take to Heal?
Healing times vary depending on the type of piercing and your personal care routine:
- Earlobe Piercings: 6–8 weeks
- Upper Ear (Cartilage) Piercings: 3–6 months
- Industrial or Tragus Piercings: Up to 9 months
A 2020 article in Clinical, Cosmetic and Investigational Dermatology found that cartilage piercings take longer due to lower blood flow, so patience and consistent cleaning are key (6).
When Can You Safely Change Your Jewelry?
You should only change your earring once the piercing is fully healed — not just when it looks fine on the surface. Signs of readiness include:
- No tenderness or swelling
- No crust or discharge
- The hole feels smooth, not sore
- Always use clean hands and sterilized jewelry when changing it. If unsure, visit your piercer for help.
Recognizing Signs of Infection Early
Even with the best care, infections can happen. Watch for:
- Persistent redness or swelling
- Yellow or green pus
- Severe pain or heat around the area
- Fever or fatigue
If these symptoms persist for more than a couple of days, consult a doctor or dermatologist. Early treatment prevents complications like abscesses or scarring.
Common Questions About Ear Piercing Care
Frequently Asked Questions (FAQ’S)
1. Can I use rubbing alcohol to clean my piercing?
A. Alcohol and hydrogen peroxide dry out the skin and slow healing. Use saline solution instead — it’s gentle and effective.
2. Is redness normal after a new piercing?
A. Mild redness and swelling for the first few days are normal. However, if it worsens or becomes painful after a week, it could signal an infection.
3. How do I sleep comfortably with a new piercing?
A. Sleep on the opposite side, or use a travel pillow with a hole in the center to reduce pressure on your ear. This prevents irritation and speeds healing.
Proper cleaning and hygiene are the foundation of a healthy, beautiful ear piercing. By following these expert-approved tips — washing hands, using saline solution, avoiding irritation, and giving your piercing time to heal — you can prevent infection and enjoy your new look worry-free.
Remember: healing takes patience, not pressure. Treat your piercing gently, and your ears will thank you with long-lasting sparkle.
