![]() Fact checked
Fact checked ![]() We have a team of smart fact checkers. They make sure our content is accurate. They use the best sources like medical journals and government websites. You can find their names and profiles on the articles they check.
We have a team of smart fact checkers. They make sure our content is accurate. They use the best sources like medical journals and government websites. You can find their names and profiles on the articles they check.

Important: This article is for informational purposes only. Please read our full disclaimer for more details.
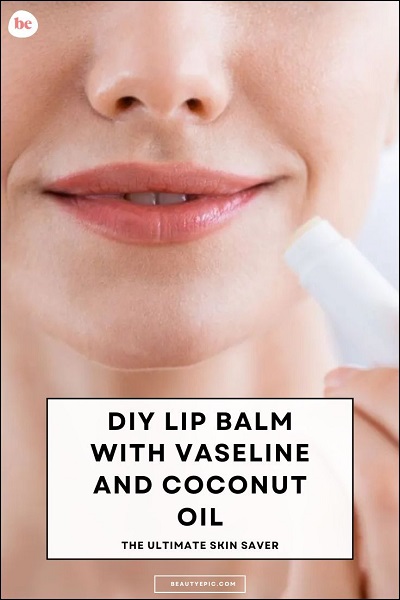
Chapped, dry lips can be a real pain, especially when the weather turns cold and dry. If you’re searching for a simple, effective solution, a DIY lip balm made with Vaseline and coconut oil might just be your new best friend. This easy-to-make balm locks in moisture and soothes cracked lips naturally, giving you a soft, healthy pout without any harsh chemicals.
Benefits of Using Vaseline and Coconut Oil Lip Balm
- Deeply hydrates and protects lips from dryness
- Creates a barrier to lock in moisture all day
- Coconut oil adds natural antibacterial and antioxidant benefits
- Vaseline offers long-lasting protection, ideal for harsh weather
- Safe, affordable, and easy to make at home
The Science Behind the Ingredients
Vaseline (Petroleum Jelly)
Vaseline forms an occlusive layer on the skin, preventing moisture loss. Studies show its effectiveness in healing dry skin by creating a protective barrier that promotes faster recovery (1).
Coconut Oil
Rich in medium-chain fatty acids, especially lauric acid, coconut oil provides moisturizing and antimicrobial properties. Research highlights its ability to nourish the skin and protect against bacteria, making it ideal for sensitive lip skin (2).
Why These Ingredients Work So Well Together
- Vaseline seals in moisture without clogging pores
- Coconut oil penetrates the skin, delivering nutrients
- Together, they soothe, hydrate, and protect lips
- The blend minimizes dryness and reduces cracking
When to Discontinue Use
If you notice irritation, redness, or allergic reactions, stop using the balm immediately and consult a dermatologist.
Adjusting Your DIY Lip Balm Recipe
Depending on your needs, you can tweak ingredient amounts:
- For extra hydration, increase coconut oil
- For a thicker balm, add more Vaseline
- To add scent or flavor, mix in a drop of natural essential oil (like peppermint or vanilla)
Which Skin Types Benefit Most?
This DIY lip balm suits nearly all skin types, especially:
- Dry and sensitive lips need extra moisture
- Normal lips want daily protection
- Those prone to chapped lips during winter or in dry climates
Is It Safe to Use?
Yes! Both Vaseline and coconut oil are generally safe for topical use. However:
- Avoid if you’re allergic to coconut products
- Do a patch test before first use
- Use pure, food-grade coconut oil for best results
Best 2 DIY Lip Balm Recipes
1. Basic Vaseline and Coconut Oil Balm: Deep Hydration Made Simple
This classic combination of Vaseline and coconut oil creates a rich, protective balm that deeply hydrates dry lips. It’s perfect for everyday use and easy to customize.
Ingredients:
- 2 tablespoons Vaseline (petroleum jelly)
- 1 tablespoon coconut oil (preferably virgin, cold-pressed)
Directions:
- Set up a double boiler by placing a heat-safe bowl over a pot of simmering water.
- Add Vaseline and coconut oil into the bowl.
- Stir occasionally as the ingredients melt and blend into a smooth liquid.
- Once fully melted and combined, remove the bowl from the heat.
- Pour the mixture into a clean, small lip balm container or tin.
- Let it cool at room temperature until it solidifies, which usually takes 1–2 hours.
- Seal the container and store it in a cool, dry place.
How to Apply:
- Use a clean finger or lip brush to apply a thin layer of balm to your lips.
- Apply whenever your lips feel dry or before exposure to harsh weather.
- For best results, apply before bedtime to allow overnight healing.
- Reapply throughout the day as needed, especially in cold or windy conditions.
Pro Tip:
If you want a softer balm, increase the coconut oil slightly. For a firmer balm, add a bit more Vaseline.
2. Nourishing Lip Balm with Honey Boost: Extra Healing Power
Adding raw honey to your Vaseline and coconut oil balm introduces natural healing and antibacterial benefits, making this balm excellent for cracked or damaged lips.
Ingredients:
- 2 tablespoons Vaseline
- 1 tablespoon coconut oil
- 1 teaspoon raw honey (preferably organic and unfiltered)
Directions:
- Melt Vaseline and coconut oil together in a double boiler, stirring gently to blend.
- Remove from the heat and add raw honey to the warm mixture.
- Stir thoroughly until the honey is evenly incorporated, creating a smooth, slightly sticky texture.
- Pour the blend into a sterilized small container.
- Allow the balm to cool and solidify at room temperature for about 1–2 hours.
- Close the container with a lid and keep it stored away from direct sunlight or heat.
How to Apply:
- Dab a small amount onto your lips using a fingertip or lip brush.
- Apply particularly on evenings or during flare-ups of dry, cracked skin.
- Use daily for ongoing nourishment and to speed up lip healing.
- Reapply as often as needed during the day to keep lips soft and protected.
Pro Tip:
Raw honey is sticky; start with a teaspoon to maintain a balm texture. Adding too much may make it gooey.
Frequently Asked Questions (FAQ’S)
1. Can I add flavors or essential oils to my lip balm?
A. Yes, but only use skin-safe essential oils and in very small amounts to avoid irritation.
2. How long does homemade lip balm last?
A. Stored in a cool, dry place, it typically lasts 3 to 6 months.
3. Can this balm be used on other dry skin areas?
A. Yes, it works well on cuticles and dry patches, but avoid sensitive facial skin if you have acne-prone skin.
Making your lip balm with Vaseline and coconut oil is a smart, cost-effective way to keep your lips healthy and hydrated year-round. Backed by science and rich in nourishing benefits, these natural ingredients protect and repair with ease. Give these DIY recipes a try and enjoy smooth, kissable lips without the fuss.