Important: This article is for informational purposes only. Please read our full disclaimer for more details.
Almond eyes are widely considered the most versatile and coveted eye shape in the entire beauty world. Characterized by a visible lid, a natural lift at the outer corners, and a balanced, symmetrical contour that mirrors a tapered almond, this shape is quite simply the perfect canvas for winged liner.
Unlike shapes that require special adjustments—like hooded eyes (which may need a “batwing” technique [1] or round eyes (which demand elongation)—almond eyes can effortlessly handle almost any wing style. From a subtle kitten flick for the office to a dramatic, graphic liner for a night out, the world of eyeliner is your oyster.
This guide distills the knowledge of top makeup artistry sources to provide a unique, expert-backed approach to mastering the absolute perfect wing for your eye shape.
Why Almond Eyes are Your Eyeliner Superpower
Almond eyes naturally taper to a point at both the tear duct and the outer corner, which guides the liner’s direction perfectly. The goal with this shape isn’t to correct or reshape, but simply to accentuate the natural lift without overwhelming the already-balanced lid space.
The Golden Rule of Almond Eyeliner: Keep the line razor-thin at the inner corner and allow it to gradually, deliberately thicken as you travel toward the outer third of the eye. This technique perfectly mimics and enhances the eye’s natural contours [2].
The “Invisible Line” Technique (Step-by-Step Mastery)
Tired of uneven wings? This unique method uses your inherent facial anatomy to guarantee perfect symmetry, overcoming the most common struggle for beginners.
Step 1: Prep & Prime
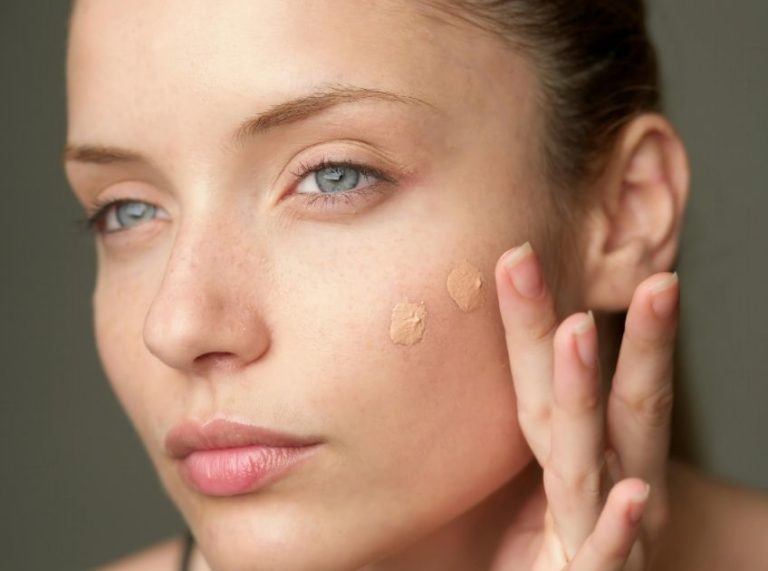
A sharp, long-lasting wing starts with a dry base. Oily lids are the enemy of longevity. Always begin with an eye primer or a thin layer of concealer set with a translucent setting powder. This creates a secure grip for the liner and prevents creasing or transfer.
Step 2: Find Your Angle (The Anatomy Hack)
Stop guessing where the wing should go. Instead, you need to follow the natural upward angle of your lower waterline.
Imagine an invisible line extending from your lower lash line up and outwards, pointed straight towards the tail of your eyebrow. This anatomical extension is your unique, ideal “lift” angle.
Pro-Tip: If you struggle to visualize this line, a classic trick is to use a physical stencil. Place the handle of a small spoon or a piece of medical tape along this angle to create a perfect edge to draw against [3].
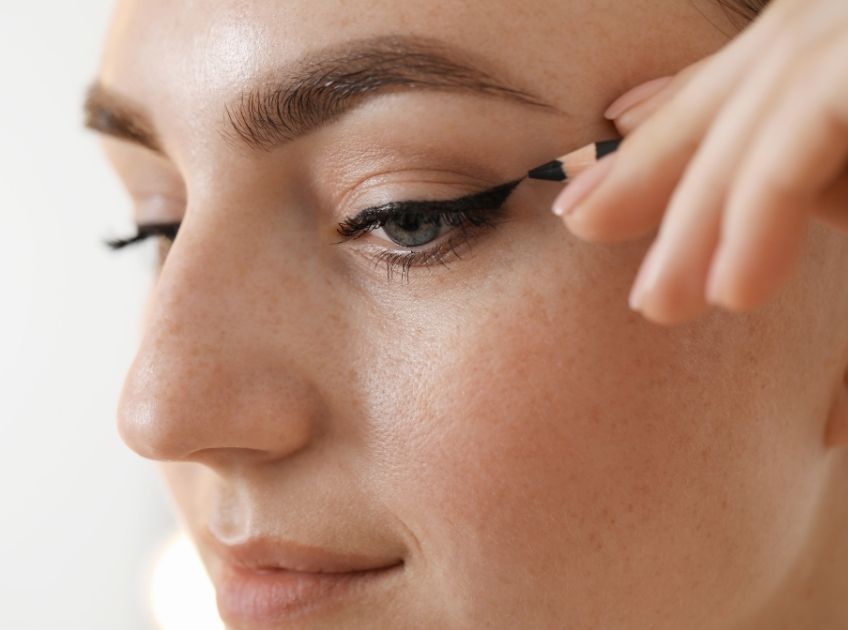
Step 3: The “Flick First” Method
Top makeup artists swear by drawing the wing before the main lid line. This ensures both sides are symmetrical before you commit to the full look [4].
- Look straight into a mirror (do not close or tilt your eye).
- Start precisely at the very outer corner of your lashes.
- Draw a thin diagonal line outward along that “invisible angle” you found in Step 2.
- Stop when the flick is about 2-5mm long for a natural look, or extend it further for high drama.
Step 4: The Connection (Creating the Triangle)
- Now it’s time to transform that line into a filled triangle.
- Place your eyeliner tip at the very end of the flick you just drew.
- Draw a line back inwards, connecting it to your upper lash line. Aim to connect it at the outer 1/3 of your eye (roughly where the edge of your pupil meets the lash line) [5].
- Fill in the empty triangular space completely.
Step 5: Tapering Inwards (The Elongation Secret)
- The key for almond eyes is avoiding a thick line across the entire lid, which can make the eye appear smaller.
- Start from the inner tear duct with the absolute tip of your liner.
- Draw an ultra-fine line that hugs the lashes.
- Smoothly connect this fine line to the thicker, outer wing, correcting any bumps in the process.
Modern Twist: For a more elongated “fox eye” look, simply line the outer half of the eye and leave the inner half bare or just tight-lined.
Expert Tips & Troubleshooting
| Problem | Solution for Almond Eyes |
| Uneven Wings | The “Dot” Method: Before drawing, place a small dot on each side where you want the wing to end. Check for symmetry, then connect the dots. |
| Closing the Eye Off | Thin Inner Corners: Ensure the liner near the tear duct is razor-thin. Thick lines here can hide the beautiful almond curvature. |
| Shaky Hands | Anchor Your Pinky: Rest your pinky finger gently on your cheekbone while drawing. This creates a stable “tripod” for maximum stability. |
| Messy Lines | The Eraser Trick: Never wipe with a finger! Use a flat angled brush dipped in a little concealer or a dedicated makeup eraser pen to “slice” the bottom of the wing for a razor-sharp, flawless edge. |
Celebrity Inspiration: Winging It Like the Stars
For daily motivation and ideas, look to these celebrities who share your versatile eye shape. Notice how they consistently focus the drama on the outer corners to enhance their natural structure.
- Kendall Jenner: Often wears a sharp, straight “fox eye” wing that elongates the eye horizontally rather than curving upward.
- Rihanna: Frequently sports a classic, bold, and incredibly sharp “cat eye” that is always defined.
- Angelina Jolie: Known for a subtle, slightly smudged wing, often created with pencil or eyeshadow, that accentuates the almond shape without any harsh lines.
- Priyanka Chopra: Often balances a defined, bold liquid wing with voluminous, dramatic false lashes.
Your Pro-Grade Product Toolkit
To achieve a truly professional result, your tools matter just as much as your technique. Here are the top-rated liners to make your wing flawless:
For Beginners (The Guide): Half Magic Wing Hack Set
- Why: Created by Euphoria makeup artist Donni Davy, this set includes a silicone guide tool (“Wing Magician”) that physically blocks you from drawing outside the lines, essentially drawing the perfect angle for you.
For Precision (The Pen): Anastasia Beverly Hills Liquid Liner
- Why: Highly rated for its exceptional, ultra-fine felt-tip and deep matte finish. This is crucial for achieving that difficult razor-thin inner corner line required for the almond eye rule.
For Long Wear (The Gel): One/Size Point Made
- Why: Known for being richly pigmented, waterproof, and “drag-proof,” making it the ideal choice if you struggle with oily lids or watery eyes and need a guaranteed all-day hold.
For Soft Wings (The Pencil): Maybelline Tattoo Studio Gel Pencil
- Why: If liquid liner feels too harsh, this creamy gel pencil allows you to sketch your wing and quickly smudge it out with a brush for a smoky, diffused effect before it sets, offering a perfect, modern soft-focus wing.