Important: This article is for informational purposes only. Please read our full disclaimer for more details.
Creating a soft dewy makeup look is an art form that balances hydration with strategic placement. As an expert, I define “dewy” as skin that looks naturally moist and healthy—as if you have just stepped out of a facial—rather than oily or heavy.
For beginners, the secret is transitioning from heavy powders to lightweight, light-reflecting creams. This guide will walk you through a professional-grade routine designed to give you a “lit-from-within” glow.
Article Contains
Soft Dewy Makeup Tutorial: A Simple Step-by-Step Guide for Beginners
Step 1: Deep Skin Preparation
The foundation of any dewy look isn’t actually makeup; it is the skin underneath. To achieve a translucent, “glass skin” finish, your canvas must be saturated with moisture. Professional artists rely on a technique called “skin flooding” to ensure the face looks plump before any color is applied.
- Cleanse & Prep: Use a sulfate-free cleanser to ensure the skin is fresh but not stripped of its natural oils.
- The Hydration Layer: Apply a serum containing Hyaluronic Acid while your skin is still slightly damp. This “magnets” moisture into the skin cells.
- Seal with Moisture: Use a medium-weight moisturizer to create a smooth, slippery surface.
- Expert Protection: Never skip SPF. Modern sunscreens often contain silica or oils that provide a natural, built-in glow.
“Dewy makeup is 70% skincare and 30% product. If the skin is thirsty, it will soak up the moisture from your foundation, leaving you looking flaky instead of fresh.”
Step 2: Building a Seamless Base
An expert base should be invisible. We want to unify the skin tone without masking your natural beauty. Beginners often make the mistake of using full-coverage matte foundations, which can look “cakey” and dry. [4]
- Radiant Priming: Apply an illuminating primer to the high points of the face (cheekbones and brow bones). This creates a “glow” that shines through the layers above.
- Sheer Coverage: Opt for a BB cream, CC cream, or skin tint. These formulas are breathable and mimic the texture of real skin.
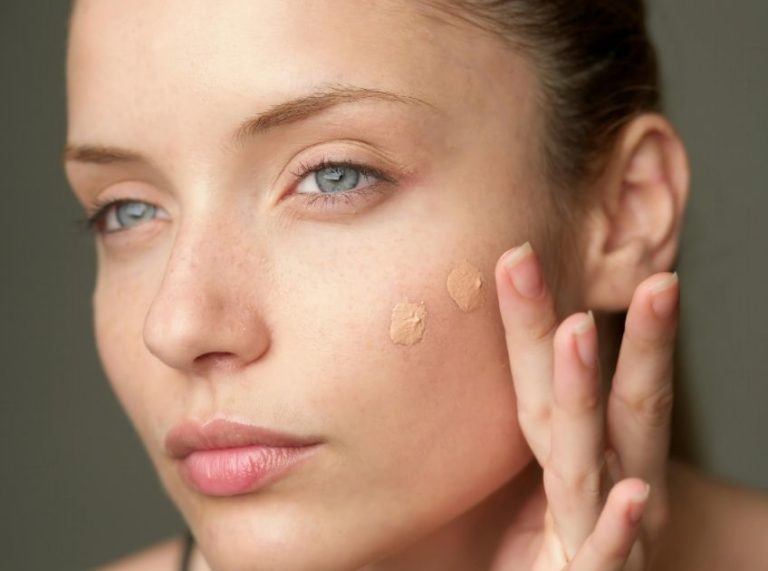
- Strategic Concealing: Instead of “triangles” of concealer, use a tiny amount only on the inner corners of the eyes and around the base of the nose.
- The Tool: Always use a damp beauty sponge. The water inside the sponge prevents it from absorbing your expensive products and helps “stipple” the makeup into the pores for a blurred finish.
Step 3: Mastering Cream Color & Light
To maintain a “juicy” appearance, you must avoid traditional powders. Powders sit on top of the skin and can look dusty. Creams, however, contain oils and waxes that melt into the skin, making the color look like it’s coming from your own blood flow.
- Cream Blush: Apply a peach or rose cream blush to the “apples” of your cheeks. For a modern, lifted look, blend the color slightly upward toward your temples.
- Liquid Highlighter: This is your “glow” focal point. Place a few drops on the cheekbones, the bridge of the nose, and the Cupid’s bow (the dip above your top lip).
- Warmth: Use a cream bronzer around the hairline to add a sun-kissed warmth.
- The Fingertip Method: Don’t be afraid to use your hands! The warmth from your ring finger helps “melt” these cream products into the skin, removing any harsh edges.
Step 4: Setting & Longevity Secrets
The biggest challenge with dewy makeup is making it last without it sliding off or becoming greasy by midday. The professional solution is “Targeted Setting.” You want to keep the glow on your cheeks but control the shine on your T-zone.
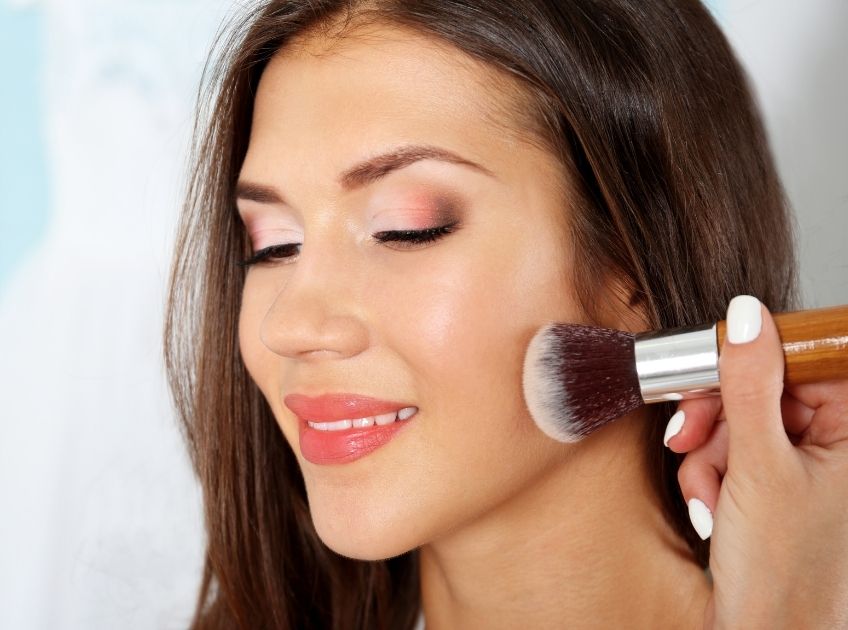
- Micro-Powdering: Use a fluffy brush to tap a tiny amount of translucent powder only on the forehead, sides of the nose, and chin. This prevents an “oil-slick” look.
- The Eyes & Lips: Keep the eyes simple with groomed brows and a coat of mascara. Finish with a tinted lip balm or gloss to mirror the shine on your face.
- The Final Seal: Mist your face with a dewy setting spray. Unlike matte sprays, these contain glycerin to lock in moisture while keeping your makeup in place for hours.
Expert Tip for Oily Skin: If you have oily skin, you can still do this look! Simply use a mattifying primer on your nose and forehead first, then apply your glow products everywhere else.
Tips for Different Skin Types
- If you have Dry Skin: Use lots of moisturizer and avoid powder completely.
- If you have Oily Skin: Use an “oil-control” primer just on your nose and chin, but keep the glow on your cheeks!
Easy Tips for Success
- Blending: If you see a harsh line, keep tapping with your damp sponge.
- Amount: Start with a tiny bit of product. You can always add more, but it is hard to take it away!
- Climate: If you live in a very hot place, keep blotting papers in your bag to dab away sweat without removing your beautiful glow.
Common Mistakes to Avoid
- Too much highlighter: You want to look glowing, not like a disco ball! Start with a little.
- Skipping moisturizer: If your skin is dry underneath, the makeup will look flaky.
- Too much powder: Powder kills the “dewy” look. Use it very sparingly.
Frequently Asked Questions (FAQ’S)
1. Can I skip primer?
A. For this look, a hydrating primer is highly recommended as it creates the “grip” needed for sheer products.
2. Will this work on acne?
A. Yes. Use a high-coverage concealer on the blemish itself, but keep the rest of the skin dewy to distract from the texture.
3. How do I touch up?
A. Don’t add more powder. Use blotting papers to soak up sweat, then mist with water or setting spray to “reactivate” the glow.
Would you like me to recommend a specific list of beginner-friendly products for each of these steps?