Important: This article is for informational purposes only. Please read our full disclaimer for more details.
Alicia Keys has always been more than just a powerhouse vocalist—she’s also a beauty and style icon, especially known for her stunning braids. From intricate cornrows to bohemian box braids, Alicia’s hair choices consistently blend culture, creativity, and confidence. This blog takes a deep dive into everything you need to know about her signature braided styles: what they are, how to recreate them, and how to keep them looking fresh.
What Makes Alicia Keys’ Braids So Unique?
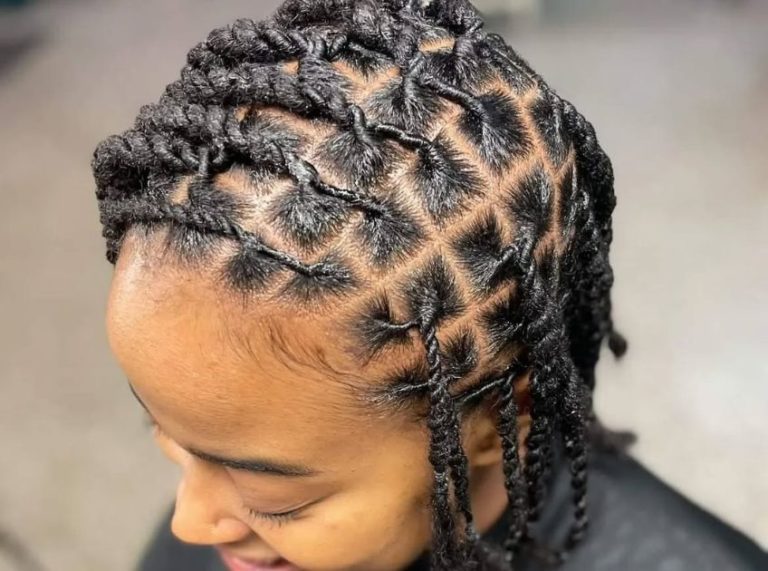
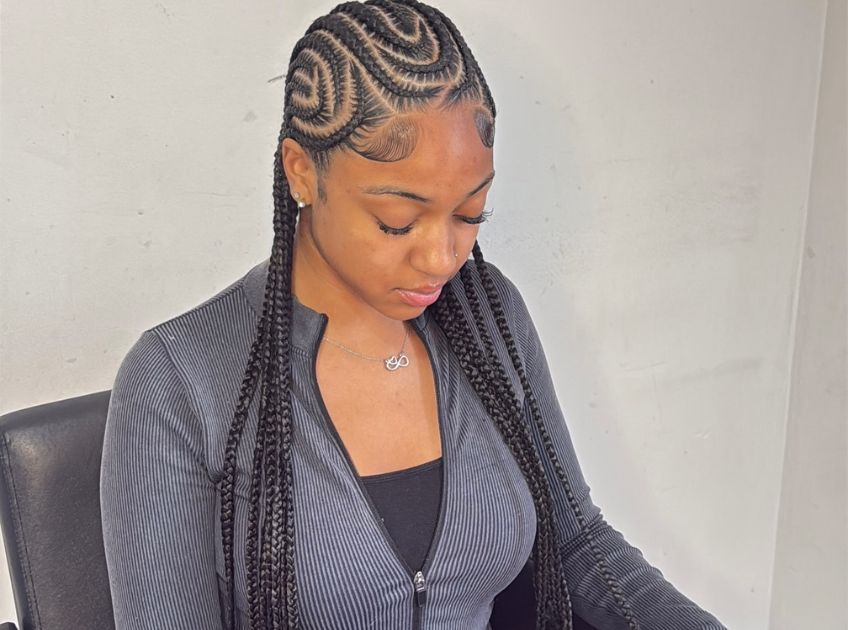
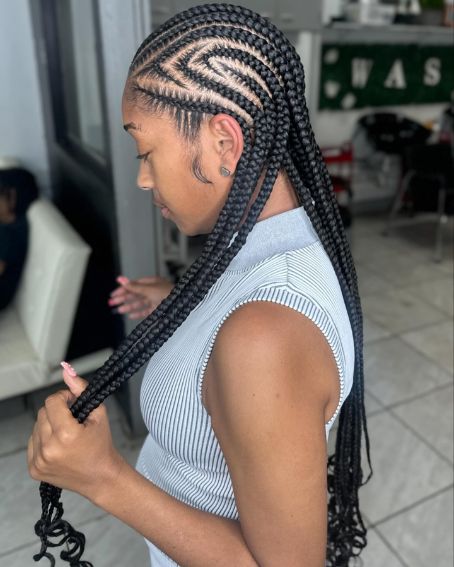
Alicia Keys’ braids are more than just a hairstyle—they’re a bold statement of heritage and self-expression. Whether she’s walking the red carpet or performing on stage, she often embraces:
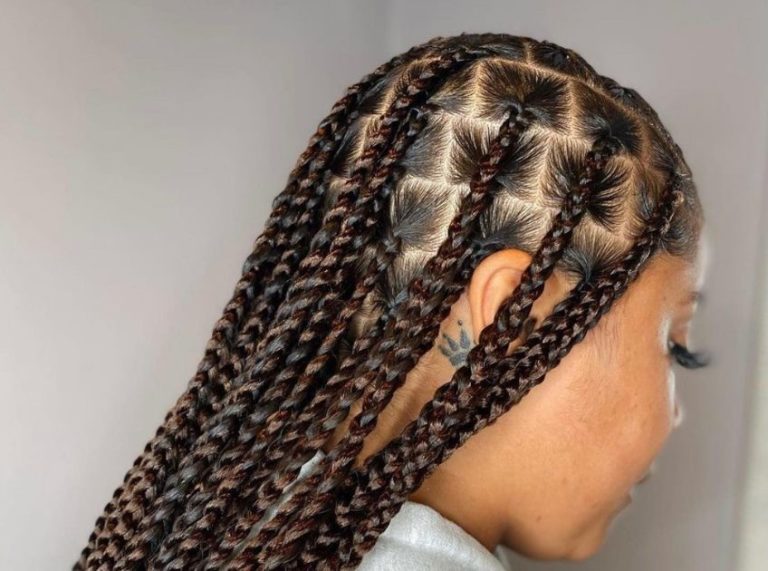
- Cornrows with unique patterns (zig-zags, swirls, or straight backs)
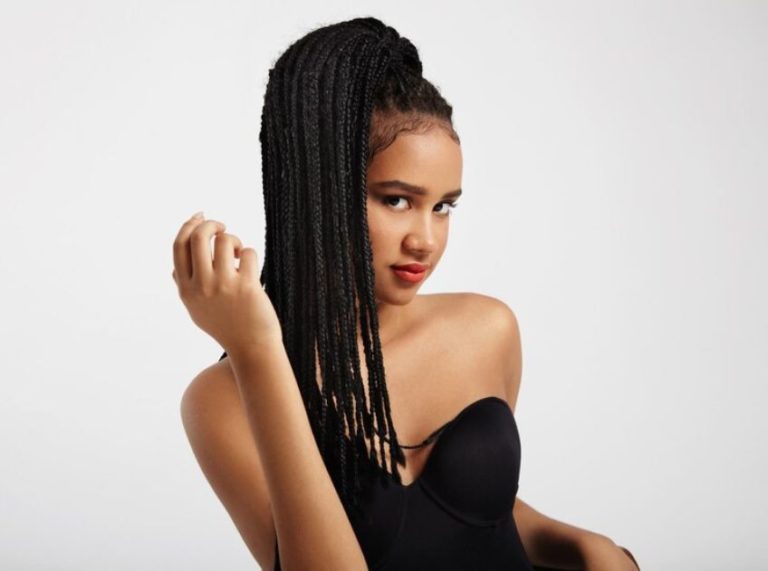
- Box braids and twist variations
- Half-up, half-down braided buns
- Accessories like beads, cuffs, or shells that elevate her look
She uses her hairstyles to celebrate Black culture and authenticity, often embracing natural textures and opting for makeup-free looks to highlight her inner beauty.
Step Inside Alicia Keys’ Braid Styles: How to Recreate the Look
Want to rock Alicia Keys-inspired braids at home or in the salon? Here’s what you’ll need and a step-by-step guide on how to get started.
Must-Have Tools & Supplies
- Rat-tail comb (for parting) (Buy Here)
- Edge control gel or styling cream (Buy here)
- Braiding hair extensions (optional for length or volume) (Buy Here)
- Clips and sectioning tools (Buy Here)
- Elastic bands or braid cuffs (Buy Here)
- Hair mousse or holding spray (Buy Here)
Alicia Keys-Inspired Braids: Step-by-Step Tutorial
From elegant cornrows to free-flowing boho braids, Alicia Keys’ braided styles always stand out with their precision, symmetry, and boldness. Recreating her look may seem intricate, but with the right prep and patience, it’s very doable—even at home or with a stylist. Below is a step-by-step guide to help you achieve Alicia Keys-inspired braids with confidence.
Step 1: Cleanse and Condition
Start with a fresh, clean canvas. Braids last longer and look sleeker on well-cleansed, hydrated hair.
- Use a sulfate-free shampoo to remove any buildup or oils from the scalp.
- Follow with a moisturizing conditioner to soften and strengthen your strands.
- Rinse thoroughly and blot excess water using a microfiber towel or cotton T-shirt to reduce frizz.
Pro Tip: Use a deep conditioner or protein mask a few days before braiding to boost hair strength, especially if adding extensions.
Step 2: Detangle and Stretch
Tangle-free, stretched hair allows for smoother braiding and cleaner parts.
- Apply a leave-in conditioner or detangling spray.
- Gently detangle using a wide-tooth comb or detangling brush, starting from the ends and working upward.
- If needed, blow-dry on low heat using a comb attachment or stretch with heatless methods like banding or braiding overnight.
Pro Tip: Stretching helps prevent unnecessary tension and reduces the chance of breakage when braiding close to the scalp.
Step 3: Section the Hair
Precise parting is key to capturing Alicia’s polished look, especially for cornrows and patterned styles.
Using a rat-tail comb, divide your hair into your desired number of sections. Alicia often goes for:
- Straight-back cornrows
- Geometric or zig-zag patterns
- Box parts for individual braids
Clip or tie off each section with alligator clips or small bands to keep the parts neat and out of the way.
Pro Tip: Use a bit of edge control or pomade along the part lines to make them extra sharp and defined.
Step 4: Add Product for Hold and Definition
Before braiding each section, smooth on a styling product to ensure grip and longevity.
- Apply edge control, shea butter, or a braid cream to each part to help tame flyaways.
- For cornrows, make sure the product smooths the roots and helps hair lay flat against the scalp.
- If using braiding hair extensions, pre-section them into equal parts to match your braid sizes.
Pro Tip: Alicia’s looks often feature a high-shine finish. Use a gel or setting foam that offers hold without stiffness.
Step 5: Begin Braiding
Now it’s time to braid! Choose your style—whether classic cornrows or individual box braids—and begin carefully and consistently.
For cornrows
- Start close to the hairline and braid tightly to the scalp, adding small sections as you move back.
- Keep consistent tension—firm but not painful—to avoid scalp irritation or hairline stress.
For box braids
- Split each box into three strands and begin a regular three-strand braid.
- If adding extensions, feed in hair gradually for a seamless look and natural thickness.
- Braid down to the ends and secure with a rubber band or braid sealer (especially for synthetic hair).
Pro Tip: Mix in gold string, beads, or shells for that signature Alicia Keys flair. She often adds cultural accessories that highlight her Afrocentric roots.
Step 6: Seal and Finish
Once all braids are complete, it’s time to lock in the style.
- Dip the ends (if using synthetic extensions) in hot water to seal and soften them.
- Use a styling mousse or setting foam all over to tame frizz and set the braids.
- Wrap your head with a silk scarf for 10–15 minutes to help mold and secure the look.
Pro Tip: Alicia often wears her braids pulled into buns, ponytails, or half-up styles. You can switch it up daily without disturbing the braid pattern.
Keep Your Braids Fresh: Maintenance Tips
To keep your Alicia Keys-inspired braids looking sleek and healthy, follow these tips:
- Wrap your hair nightly with a silk or satin scarf to reduce frizz.
- Use a lightweight oil or braid spray to moisturize your scalp and braids.
- Cleanse gently once a week with a diluted shampoo or scalp cleanser.
Avoid heavy styles or tight pulls to prevent tension breakage, especially around the hairline.
Frequently Asked Questions (FAQ’S)
1. How long can I keep Alicia Keys-style braids in?
A. Typically, braids can last 4–6 weeks with proper care. Make sure to moisturize regularly and avoid excessive manipulation.
2. Do I need extensions to recreate her styles?
A. Not always. Alicia has rocked both natural-length cornrows and longer box braids. Extensions help with length and volume but aren’t essential.
3. Can any hair type wear Alicia Keys’ braids?
A. Yes, though they’re best suited for textured or coily hair. For straighter hair types, prep with texturizing spray or consult a stylist to help braids hold.
Final Thoughts: More Than Just a Hairstyle
Alicia Keys’ braids represent more than fashion—they are cultural, empowering, and deeply personal. Whether you’re experimenting with braids for the first time or looking to pay homage to her iconic looks, these styles offer both beauty and meaning. With the right tools, care, and inspiration, you can bring her signature braid game into your world confidently and creatively.