![]() Fact checked
Fact checked ![]() We have a team of smart fact checkers. They make sure our content is accurate. They use the best sources like medical journals and government websites. You can find their names and profiles on the articles they check.
We have a team of smart fact checkers. They make sure our content is accurate. They use the best sources like medical journals and government websites. You can find their names and profiles on the articles they check.

Important: This article is for informational purposes only. Please read our full disclaimer for more details.
Struggling with facial hair but wary of harsh chemicals or salon waxes? You’re not alone. Many women seek gentle, natural methods to remove unwanted hair without compromising their skin’s barrier. A homemade facial hair removal mask could be your answer—safe, affordable, and surprisingly effective.
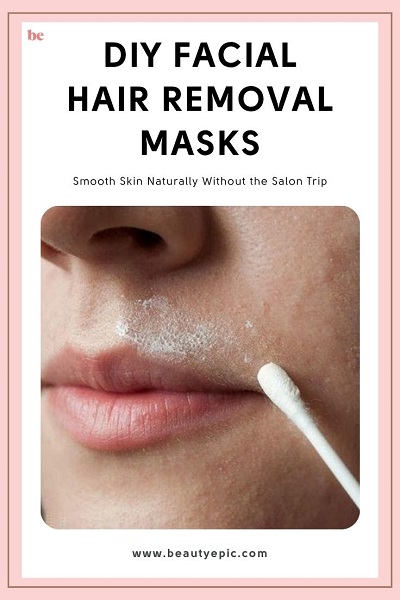
This blog delves into the benefits, science, and best DIY recipes to help you achieve naturally fuzz-free skin.
Why Choose a Natural Facial Hair Removal Mask?
- Reduces facial hair over time
- Gently exfoliates dead skin cells
- Nourishes skin while removing hair
- Saves money on repeated salon treatments
Natural masks can double as skincare, removing fine hair while improving texture and tone.
The Powerful Blend: What’s Inside These Masks?
DIY masks often combine ingredients like:
- Turmeric – contains curcumin, which inhibits hair growth (1)
- Gram Flour (Besan) – exfoliates and clings to fine hair (2)
- Gelatin – helps pull hair from roots (3)
- Honey and Milk – soothe and hydrate post-removal
Each component plays a specific role—some target the hair root, while others prevent inflammation and irritation.
Know When to Hit Pause
Discontinue use if you notice:
- Redness or a rash lasting more than a few hours
- Excessive dryness or peeling
- Any burning or itching sensation
If you’re unsure, patch test on your jawline before applying the full mask.
Need More or Less? Adjusting Ingredient Quantities
Depending on your skin size or hair density, you can tweak the recipe:
- Add more gram flour for a thicker paste and stronger hair pull
- Use less turmeric to avoid yellow stains
- Increase honey or milk for sensitive skin
Customization is key for effective, irritation-free results.
What Skin Types Benefit the Most?
These masks are best suited for:
- Normal to oily skin – absorbs and detoxifies well
- Combination skin – with careful moisturizing afterward
Avoid on very dry or broken skin, especially if using gelatin-based masks.
Is It Safe to Use?
Yes, when used properly and not more than twice a week. Always follow with:
- Cooling toner or aloe vera gel
- Lightweight moisturizer
- Sunscreen is applied during the day
Safety improves when ingredients are fresh and masks are not overused.
2 Best DIY Facial Hair Removal Masks
DIY 1: Turmeric & Gram Flour Hair Removal Mask
A traditional remedy for fine facial hair, this mask also brightens and tones the skin naturally. Ideal for weekly use on areas like the upper lips, cheeks, or chin.
Ingredients:
- 1 tablespoon gram flour (besan)
- 1/4 teaspoon turmeric powder (preferably Kasturi turmeric)
- 1 teaspoon raw milk
- 1/2 teaspoon honey
- Few drops of rose water (optional for fragrance and added hydration)
Directions:
- In a small bowl, mix gram flour and turmeric.
- Add honey and milk, stirring until you get a thick, smooth paste.
- If the paste feels too dry, add rose water drop by drop until the desired consistency is achieved.
- Let the mixture sit for 5 minutes to activate ingredients.
How to Apply:
- Cleanse your face and pat dry.
- Apply the mask evenly over areas with facial hair.
- Allow it to dry completely (approx. 20–25 minutes).
- Once dry, gently scrub in circular motions using damp fingers to remove the mask and loosen hair.
- Rinse thoroughly with lukewarm water and follow with a moisturizer.
Pro Tip: Use Kasturi turmeric to avoid staining and reduce the risk of yellow residue. Avoid applying to active acne or cuts.
DIY 2: Gelatin & Milk Peel-Off Mask for Deep Hair Grip
A powerful peel-off mask that lifts fine hairs, dead skin, and blackheads. Best used for cheeks, upper lip, or chin—not recommended for sensitive areas.
Ingredients:
- 1 tablespoon unflavored gelatin powder
- 2 tablespoons full-fat milk
- 1 drop lavender essential oil (optional for calming effect)
- Wooden spatula or face mask brush
Directions:
- In a microwave-safe bowl, combine gelatin and milk.
- Microwave for 10–15 seconds until the mixture becomes smooth and slightly thick.
- Stir well and let it cool for 1 minute—it should be warm but not hot.
- Add a drop of lavender oil for skin-soothing benefits.
How to Apply:
- Start with a freshly cleansed face, dry it completely.
- Using a brush or spatula, apply a thick layer over areas with facial hair.
- Avoid eyebrows, eye area, and lips.
- Let it dry fully (15–20 minutes). You’ll feel it tighten as it sets.
- Slowly peel off from bottom to top.
- Wipe off any residue with a damp towel and moisturize immediately.
Pro Tip: Apply a warm towel to your face before applying the mask to open pores for easier hair removal. Do not use this mask more than once a week.
Frequently Asked Questions (FAQ’S)
1. Can I use these masks daily?
A. No. Limit use to once or twice a week to avoid skin irritation or thinning.
2. Will the hair grow back thicker?
A. No. These masks only remove hair at the surface or root—it won’t alter hair thickness.
3. What if I have hormonal facial hair growth?
A. These masks offer temporary relief. For persistent or coarse hair, consult a dermatologist.
Facial hair removal doesn’t have to be painful or costly. These DIY masks offer a gentle, science-backed way to reduce hair and improve skin texture. With regular use and care, you’ll notice smoother, clearer skin—right from your kitchen.