Important: This article is for informational purposes only. Please read our full disclaimer for more details.
Thinking about starting locs but don’t know where to begin? Starter locs are the foundation of your loc journey—a symbolic and transformative phase where your natural hair begins its path toward beautifully matted, mature locs. Whether you’re embracing them for style, simplicity, or spiritual reasons, understanding how starter locs work is essential for success.
What Are Starter Locs?
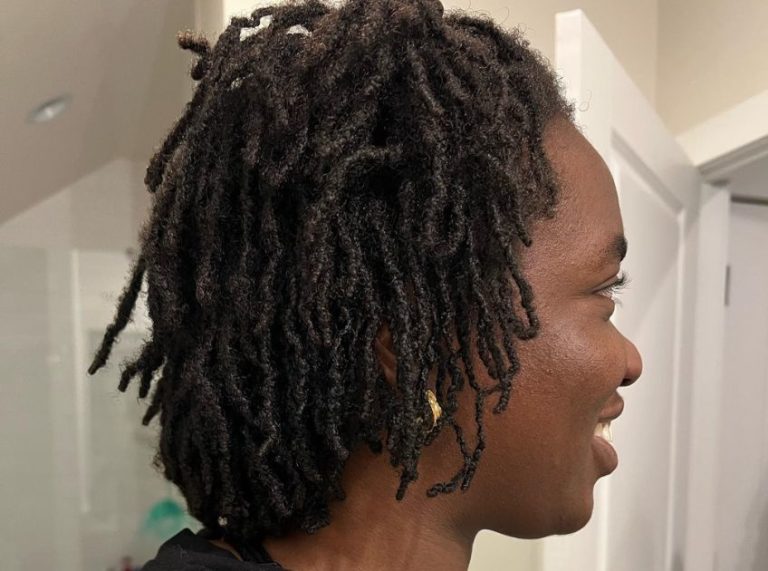
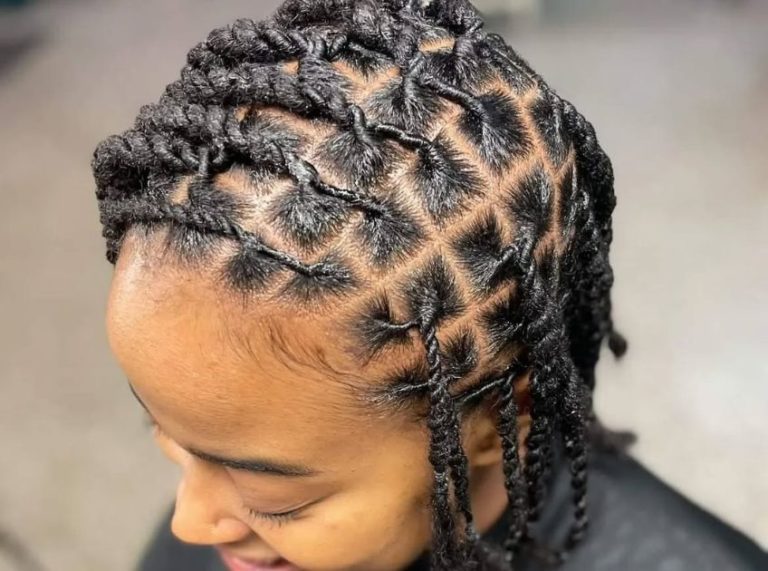
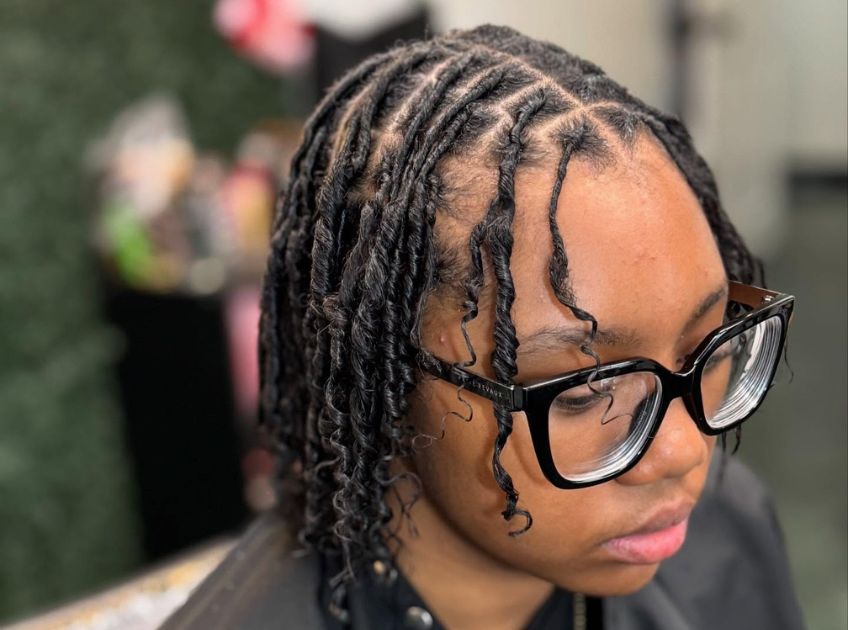
Starter locs—also called “baby locs”—are the initial phase of the loc formation process. This is when your natural hair is sectioned and styled into coils, twists, or braids to begin the locking journey. Over time, these units mesh and tighten into mature loci.
Common starter loc methods include:
- Two-strand twists
- Comb coils
- Backcombing (for certain hair textures)
- Braids or plaits
Choosing the right method depends on your hair type, lifestyle, and the look you want as your locs mature.
Top Reasons to Love Starter Locs
Starter locs offer more than just aesthetics—they’re a step toward embracing your natural texture and low-maintenance lifestyle. Here are a few standout benefits:
- Low manipulation: Reduces breakage and supports healthy hair growth.
- Scalp visibility: Allows you to monitor scalp health and progress.
- Versatility in method: Multiple ways to start based on texture and personal preference.
- Builds patience and confidence: The journey teaches you self-love and acceptance.
- Cost-effective: Less frequent salon visits and fewer products required.
How to Start Your Locs Journey the Right Way
Whether you DIY or see a locician, preparation and the right tools will make all the difference.
Must-Have Tools and Products
Before you begin, gather these essentials:
- Rat-tail comb (for parting) (Buy Here)
- Natural-hold gel or locking cream (Buy Here)
- Spray bottle with water
- Clarifying shampoo
- Hair clips for sectioning (Buy Here)
- Satin or silk scarf/bonnet for nightly protection
Step-by-Step Starter Loc Installation

Starting your loc journey is both exciting and deeply personal. Whether you choose to go to a professional locician or do it yourself at home, understanding each step of the process ensures your locs form properly and reflect your desired look. Below is a detailed step-by-step guide for installing starter locs using two of the most common methods: comb coils and two-strand twists, especially ideal for those with Type 3 or Type 4 natural hair.
1. Wash and Clarify Your Hair
Why this matters
Starter locs need a clean slate. Any product buildup, oil, or dirt can hinder the locking process.
- Use a clarifying shampoo to deeply cleanse the scalp and hair.
- Skip the conditioner for now—it may soften your strands too much, causing the starter locs to unravel early.
- Pat your hair dry with a microfiber towel or an old cotton T-shirt to prevent frizz.
2. Section Your Hair for Symmetry and Style
Why this matters
Your parting pattern will define how your locs look as they mature. Clean, consistent parts make for neater locs.
- Decide on a parting style: square, diamond, organic/freeform, or bricklay.
- Use a rat-tail comb to create uniform sections, working from the nape upward.
- Clip away each section to keep them neat as you work.
Pro Tip: Start with larger sections if you want thicker locs, or smaller ones for thinner, more defined locs.
3. Apply a Lightweight Locking Product
Why this matters
You’ll need something to hold the hair in place without causing buildup.
- Choose a lightweight gel, butter, or twisting cream—preferably one without heavy oils or silicones.
- Apply a small amount to each section, focusing on the roots and working down to the ends.
4. Create the Locs: Choose Your Method
You can start with comb coils or two-strand twists, depending on your hair texture and desired result.
Method A: Comb Coils (Best for shorter or tightly coiled hair)
- Insert the rat-tail comb at the base of a section.
- Twist the comb downward in a circular motion until the entire strand coils from root to tip.
- Ensure the coil is tight but not pulling your scalp.
Result: These coils will gradually mat into locs with minimal manipulation.
Method B: Two-Strand Twists (Great for medium-to-long natural hair)
- Split the section into two equal parts.
- Twist the strands around each other tightly from root to tip.
- Coil the ends with your fingers for a sealed finish.
Result: Two-strand twists give a chunkier look and help minimize unraveling during the early weeks.
5. Let Hair Set and Dry Thoroughly
Why this matters
Wet locs can unravel easily and promote mildew if not properly dried.
- Use a hooded dryer or let your hair air-dry completely.
- Avoid manipulating the locs while drying to preserve their form.
6. Protect and Maintain the Shape
- Wrap your hair with a satin or silk scarf at night to reduce frizz and preserve parts.
- Avoid scratching or tugging on your starter locs—this can disrupt the formation process.
- Refrain from styling too early. Let your locs “set” for at least a couple of weeks before any major updos or braiding.
Bonus: First Retwist Timeline
Most people need their first retwist within 4–6 weeks, depending on hair growth, texture, and how well the initial locs hold. Over-retwisting can lead to thinning, so be mindful of spacing out maintenance.
Caring for Your Starter Locs: Do’s and Don’ts
Proper maintenance will prevent unraveling and promote healthy locking.
Do
- Cover your hair with silk or satin at night.
- Moisturize your scalp using light oils or water-based sprays.
- Keep your hands out of your locs to avoid frizz or disruption.
- Rewind only when necessary (typically every 4–6 weeks).
Don’t
- Overwash; limit washing to once every 3–4 weeks in the beginning.
- Apply heavy products that cause buildup.
- Rush the process—starter locs take time to mature.
Frequently Asked Questions (FAQ’S)
1. How long does it take for starter locs to lock?
A. It can take anywhere from 6 months to 2 years, depending on your hair type, texture, and maintenance routine.
2. Can I wash my hair with starter locs?
A. Yes, but it’s important to avoid overwashing in the beginning. Use a stocking cap or braid/twist your locs before washing to prevent unraveling.
3. Are starter locs itchy?
A. Some people experience scalp itchiness as a normal part of the process. Keep your scalp moisturized and avoid scratching to reduce irritation.
Final Thoughts
Starter locs are more than just a hairstyle—they’re the start of a personal and often empowering journey. With patience, care, and consistency, your locs will mature into a style that reflects your unique identity. Whether you go it alone or with a trusted locician, every phase of the loc journey tells your story.