Important: This article is for informational purposes only. Please read our full disclaimer for more details.
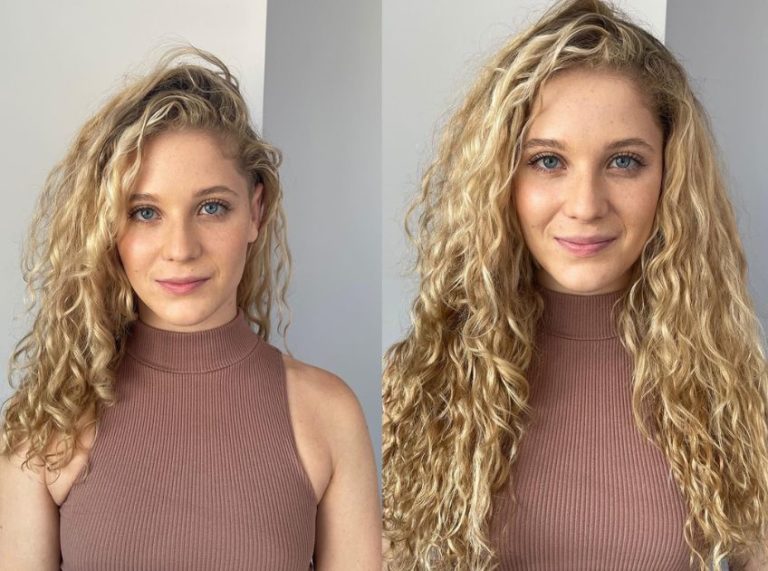
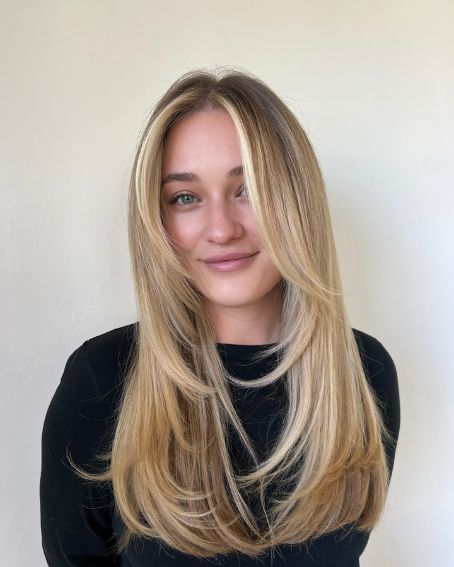
Face-framing layers aren’t just a haircut — they’re a strategic style tool. They can soften features, add movement, highlight your best angles, and even make hair look healthier. Whether you’re aiming for a romantic, wispy look or a bold, defined shape, the right face-framing layers can transform your entire hairstyle. With a steady hand, the right tools, and a few pro tips, you can achieve salon-worthy results right at home.
Your Styling Arsenal: Tools and Materials You’ll Need
Before you snip, make sure you have:
- Sharp hair-cutting shears (never kitchen scissors!) (Buy Here)
- Sectioning clips to keep hair neat (Buy Here)
- Fine-tooth comb for precision (Buy Here)
- Spray bottle with water to lightly dampen hair
- Handheld mirror for checking angles
- Elastic bands (optional for beginner-friendly sectioning)
Step-by-Step: Cutting Perfect Face-Framing Layers at Home
1. Prep Your Hair for a Precision Cut
- Wash & Condition: Start with freshly washed hair to remove oil, product build-up, and dirt. This ensures a cleaner cut and prevents scissors from slipping.
- Towel-Dry & Detangle: Gently towel-dry your hair until it is about 70–80% dry, then run a wide-tooth comb through to remove tangles.
- Lightly Mist with Water: Use a spray bottle to dampen sections as you work. This helps keep hair smooth and controlled.
💡 Pro tip: Cutting hair too wet can make you cut shorter than intended because hair springs up when dry.
2. Find Your Most Flattering Parting
- Stand in front of a mirror and create your natural parting — either center or side, depending on your style.
- Stick to your usual part because layers are cut to frame your face based on this position. Switching it later can make one side look longer.
3. Section Your Hair Like a Pro
- Front Sections: Comb from the top of your head down to just behind the ears, and clip the rest of your hair back.
- Back Section: Keep it secured so you can focus solely on the front pieces.
- If your hair is thick, split the front section into upper and lower halves for more control.
4. Decide Where the Layers Should Begin
- For a soft, subtle look, start the shortest layer at chin level.
- For dramatic, face-opening layers, start at the cheekbones.
- If you want blended, long layers, start just above the collarbone.
💡 Face Shape Guide:
- Round face → Start layers below the chin to elongate the face.
- Square face → Start around the cheekbones to soften jaw angles.
- Oval face → You have more freedom; chin or cheekbone length works well.
5. The Over-Direction Cutting Technique
- Take a 1–2 inch section from the front, and comb it straight down.
- Hold your scissors at a slight diagonal, pointing towards the ends of your hair.
- Point-Cutting Method: Snip in tiny, upward motions rather than cutting straight across — this creates a feathered edge and blends more naturally.
- Gradually cut longer as you move away from the face, creating a slope.
6. Mirror Your Cuts on the Other Side
- Comb the opposite front section straight down.
- Use the already-cut section as a guide to match lengths and angles.
- Keep checking symmetry by looking in a handheld mirror and turning your head side to side.
7. Blend Layers for a Seamless Finish
- Release the rest of your hair and check if the new layers blend naturally into the length.
- Use point-cutting along any harsh lines to soften them.
- For extra smoothness, hold small vertical sections and lightly snip into the ends — this removes bulk without changing length.
8. Final Check & Styling
- Blow-dry hair with a round brush to see how the layers move.
- If you spot unevenness, do micro-trims rather than big cuts.
- Style as usual — curls, waves, or sleek straight — to enjoy the new framing effect.
💡 Pro tip: Always cut less than you think you need to. You can go back in and shorten, but you can’t undo a cut that’s too short.
Frequently Asked Questions (FAQ’S)
Q1. Can I cut layers on curly or wavy hair using the same method?
A. Yes, but always cut curly hair dry or in its natural state to account for shrinkage. The starting point should be slightly longer than your intended length.
Q2. How often should I refresh face-framing layers?
A. Every 6–8 weeks keeps them looking sharp and prevents split ends from traveling up the hair shaft.
Q3. Is it safe for beginners to cut their layers?
A. Yes, if you go slow, use proper tools, and keep the cuts minimal at first. You can always trim more, but you can’t put length back once it’s gone.
Cutting perfect face-framing layers at home is possible with the right approach. Start conservatively, focus on symmetry, and remember: small, angled snips will always look more natural than bold chops. With time, you’ll gain the confidence to shape your hair exactly the way you want, giving you a fresh, face-flattering look without stepping into a salon.