Important: This article is for informational purposes only. Please read our full disclaimer for more details.
Goddess locs are the perfect blend of boho beauty and protective styling. They’ve taken over red carpets, social media, and natural hair communities—and for good reason. This chic, low-maintenance hairstyle mimics traditional locs with a soft, wavy twist. Whether you’re going for an ethereal goddess vibe or just need a stylish protective look, goddess locs deliver beauty and strength in one.
Ready to transform your look? Let’s dive into how you can do goddess locs at home like a pro.

What Exactly Are Goddess Locs?
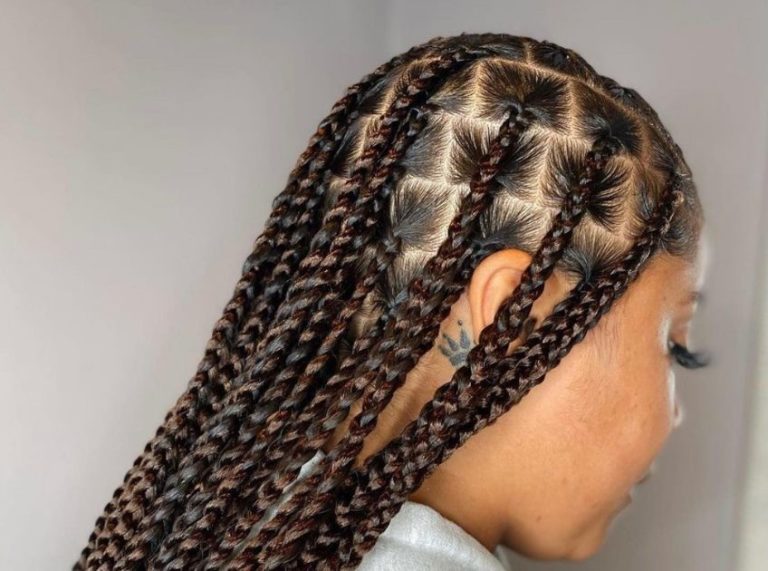
Goddess locs are a type of faux loc hairstyle, but with a twist—literally. Unlike traditional faux locs, goddess locs feature loose, wavy ends that give off a soft, romantic finish.
- Protective yet pretty: They shield your natural hair while giving you a free-flowing, beachy vibe.
- Long-lasting: Typically lasting 4–8 weeks with proper care.
- Versatile: Wear them long, short, colored, or accessorized—your crown, your rules.
They’re usually created by wrapping synthetic hair (like Marley or water wave hair) around natural hair or braids, then leaving the ends loose and curly.
DIY Goddess Locs: What You’ll Need
Before you begin, gather your essentials. Prepping with the right tools and hair will make the process smoother and the results sleeker.
Tools & Hair Extensions Needed
- Rat-tail comb (for parting) (Buy Here)
- Hair clips or sectioning clamps (Buy Here)
- Moisturizer or leave-in conditioner (Buy Here)
- Crochet needle (for the crochet method) (Buy Here)
- Marley hair (for wrapping) (Buy Here)
- Water wave hair (for the curly ends) (Buy Here)
- Shine spray or mousse (optional, for finish) (Buy Here)
- Lighter or boiling water (if sealing is needed)
Step-by-Step Guide: How to Install Goddess Locs at Home

Creating goddess locs at home may seem intimidating at first, but once you get into the rhythm, it becomes an artistic and satisfying process. Below is a detailed walkthrough designed to help beginners achieve a salon-quality look in the comfort of their own home.
Step 1: Prep Your Natural Hair
Before installing goddess locs, it’s essential to start with clean, nourished hair.
- Cleanse: Shampoo and deep condition your hair to remove buildup and hydrate your strands. Goddess locs are a protective style, so begin with a healthy foundation.
- Dry: Blow-dry your hair or allow it to air-dry in stretched styles like chunky twists or braids to make it easier to manage.
- Moisturize: Apply a leave-in conditioner and seal in moisture with a light oil (like jojoba or argan oil).
- Detangle: Use a wide-tooth comb to ensure your hair is tangle-free.
Pro Tip: Apply a scalp oil or anti-itch serum to soothe your scalp before the installation process, especially if you have a sensitive scalp.
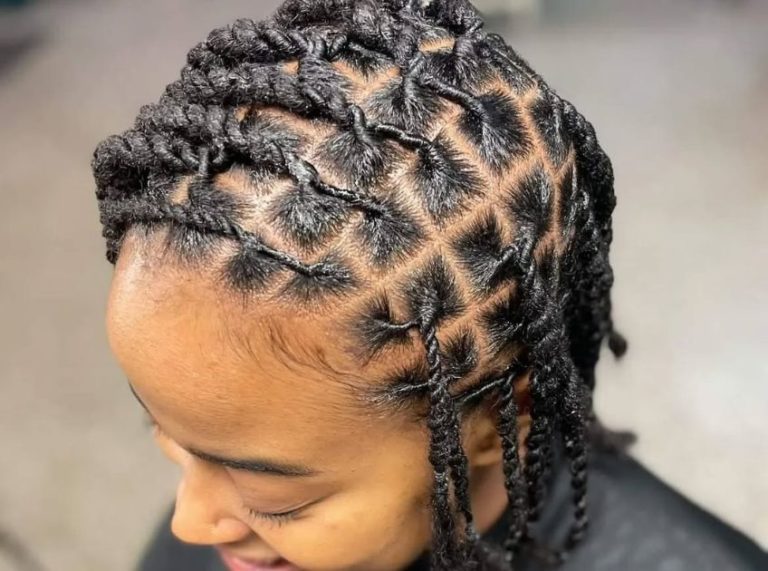
Step 2: Section and Braid Your Hair
Proper sectioning is crucial for a clean and uniform look.
- Parting: Using a rat-tail comb, divide your hair into small to medium box-shaped sections. Make sure each part is neat; this forms the base of each loc. Use hair clips to keep sections separated.
- Braiding: Braid each section down to the end. If your hair is short, secure the ends with tiny rubber bands to keep them from unravelling.
- Crochet Base Alternative: If you prefer a faster install, cornrow your hair and crochet the extensions into the cornrows. This is lighter and ideal for a quick style.
Pro Tip: For a more natural look, vary your parting size slightly—this creates a boho, lived-in feel.
Step 3: Add the Curly Hair First
Goddess locs are known for their signature curly ends. You’ll want to install the curly hair before wrapping.
- Take a Piece of Water Wave Hair: Fold it in half.
- Use a Crochet Hook: Insert it through the root of your braid, loop the curly hair through, and gently pull it halfway through so it hangs equally on both sides.
- Let it Hang: Don’t wrap this piece—this becomes the soft, curly end that distinguishes goddess locs from regular faux locs.
Pro Tip: For a fuller look, you can feed in more curly pieces toward the middle or end of the loc while wrapping.
Step 4: Wrap with Marley Hair
This is the most detailed step and creates the texture and shape of your goddess locs.
- Start Wrapping at the Root: Use a piece of Marley hair, fold it slightly so you have an anchor, and begin wrapping at the root of your braid. Make sure the base is tight to prevent slipping.
- Thumb Method for Texture: Use the thumb method to create that “distressed” look, where you wrap, pause, and lightly loop the hair around your thumb to form bumps and irregular texture.
- Wrap Past the Braid: Continue wrapping until you’re just above the curly hair extension that you left hanging earlier. Stop once the braid is covered, but don’t wrap the curls!
- Secure the End: Tuck the end of the Marley hair into itself and palm roll. Alternatively, seal with a lighter or dip in boiling water if needed (only if using synthetic hair).
Pro Tip: Use a mirror or ask for help with the back sections to ensure even wrapping and a tidy finish.
Step 5: Repeat and Refine Your Look
- Repeat: Follow the same method for all sections of your head. Take breaks if needed—installing can take several hours, depending on your speed and the size of your locs.
- Smooth It Out: Apply styling mousse generously over the finished locs to smooth down flyaways and set the style.
- Edge Styling: Use an edge control gel or pomade to lay down your baby hairs for a polished finish.
Pro Tip: For extra glam, add accessories like gold cuffs, beads, or string to a few locs for a unique, personalized look.
Frequently Asked Questions (FAQ’S)
Q1: How long do goddess locs last?
A. Goddess locs can last 4 to 8 weeks, depending on maintenance and hair type. Wrapping tightly and sleeping with a satin bonnet will help them last longer.
Q2: Can I wash my hair with goddess locs?
A. Yes. Use a diluted shampoo mix and gently cleanse your scalp with a spray bottle or applicator tip to avoid frizz and buildup.
Q3: Are goddess locs heavy?
A. When done correctly with lightweight hair, they should not be overly heavy. However, avoid overloading each loc with too much hair to prevent tension on the scalp.
Final Thoughts: Embrace Your Inner Goddess
Goddess locs are more than a hairstyle—they’re a celebration of individuality, beauty, and protection. Whether you’re trying them for a vacation, event, or everyday slay, you’ll love the freedom and flair they offer. With a little time and the right technique, you can recreate this salon-worthy look right at home.