Important: This article is for informational purposes only. Please read our full disclaimer for more details.
Are you experiencing chronic pain on your lower back? Back pain is a common problem. There’re many causes of this discomfort including, pregnancy, muscle strain, aging, and sedentary lifestyle among others.
A study by the American Chiropractic Association reveals that over 80% of the population experience back pain problems. Among many remedies to these issues, yoga is one of the most effective exercises for reducing this discomfort and tightness. Discover seven yoga poses to relieve lower back pain.
7 Best Yoga Poses for Lower Back Pain Relief
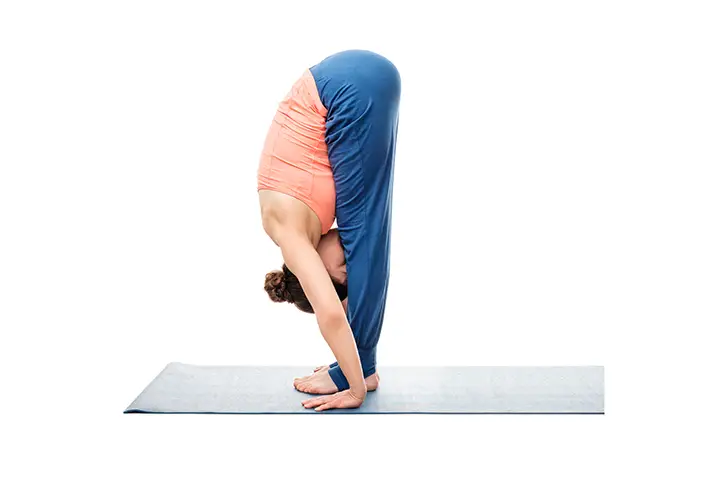
1. Standing Forward Bend
How to Do Forward Bend Pose:
- Stand straight keeping your feet shoulder-width apart.
- Let your knees loose. Then, straighten your legs as much as possible and let your upper body hang down.
- Tuck your chin towards your chest, relax the shoulders and extend your head’s crown to the floor.
- Continue in a standing forward pose for up to 3 minutes. Also, ensure that the bend comes from the hips and not your back.
Benefits of Standing Forward Bend: This yoga pose is known to stretch your back as well as lengthening your spine, thus relieving lower back pain. It also helps in providing relief on tense and tight shoulders.
[ Read: Yoga Poses For Back Pain Relief ]
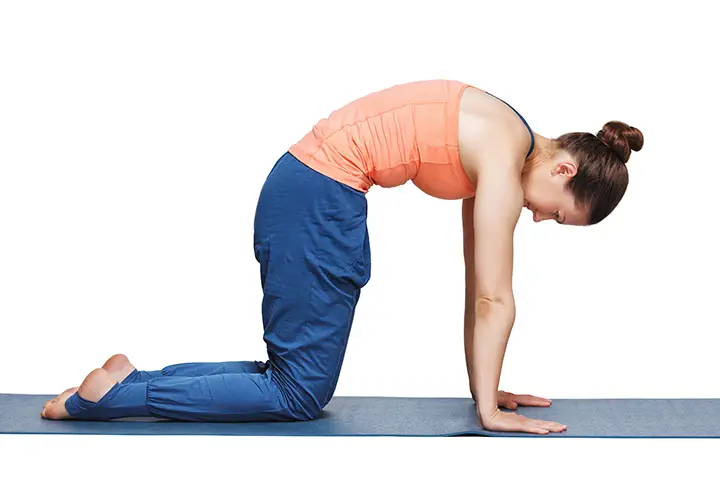
2. Cat-Cow Pose
How to Do Cat Cow Pose:
- Another great yoga pose for relieving lower back pain is cat cow pose.
- Resting in all fours position, bend into a cat pose by arching your back, then pressing your spine up.
- Inhale when lifting the tailbone and chest upwards, then exhale when arching your back.
- Hold the position for several minutes then move to the cow pose.
- Raise your spine inwards, press your shoulder blade and lift your head.
- Continue for six to eight slow rounds, depending on your breathing rhythm.
Benefits of Cat Cow Pose: Cat cow yoga pose relieves achy or sore back. It also loosens your muscles, either as part of your yoga routine or warming up for a workout.
[ Read: Benefits of Bikram Yoga ]
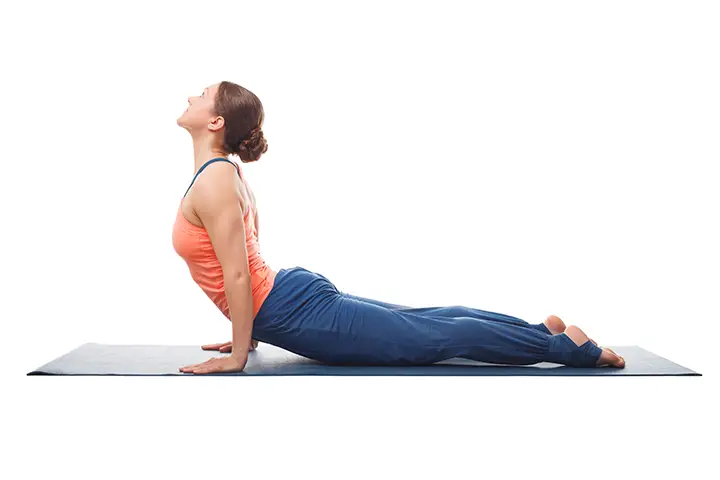
3. Upward-Facing Dog Pose
How to Do Upward-Facing Dog:
- Start by resting on the floor or your yoga mat.
- Let your palms face down by the midpoint of your ribs.
- By drawing your legs together and pressing the top of your feet on the floor, lift your chest up from the floor using your back strength, but not your hands.
- Keep your legs extended outwards at first.
- Stay for this position for up to 10 breath counts.
Benefits of Upward-Facing Dog: This pose is helpful in opening up your chest. It also engages your lower back and stretches abdominal muscles.
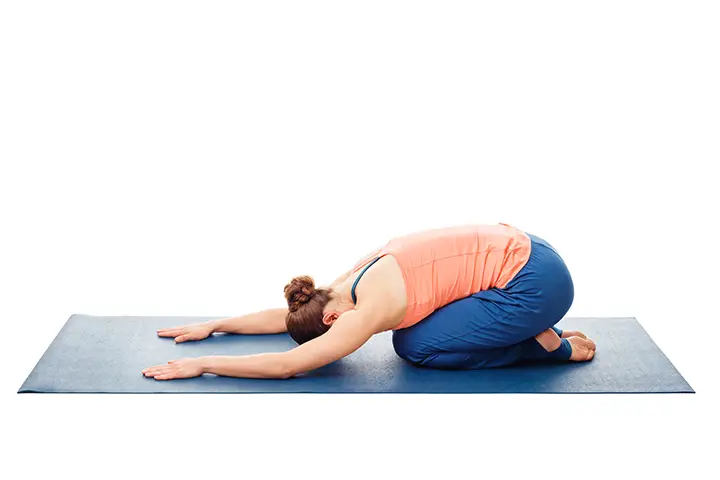
4. Child’s Pose
How to Do Child’s Pose:
- Kneel on the mat and keep your knees hip-width apart.
- Put your feet together and relaxed behind you.
- Take a deep breath and exhale while laying the upper body on your thighs.
- Try lengthening the spine and neck by pulling the ribs away from the tailbone, and the crown away from the shoulders.
- Rest the forehead on the floor and extend your arms in front.
- Hold for this pose for two to three minutes.
Benefits of Child’s Pose: Child’s yoga pose offers a great stretch, and it helps in elongating your back. It’s also an excellent choice for expectant mothers, looking for a good lower back pain relief.
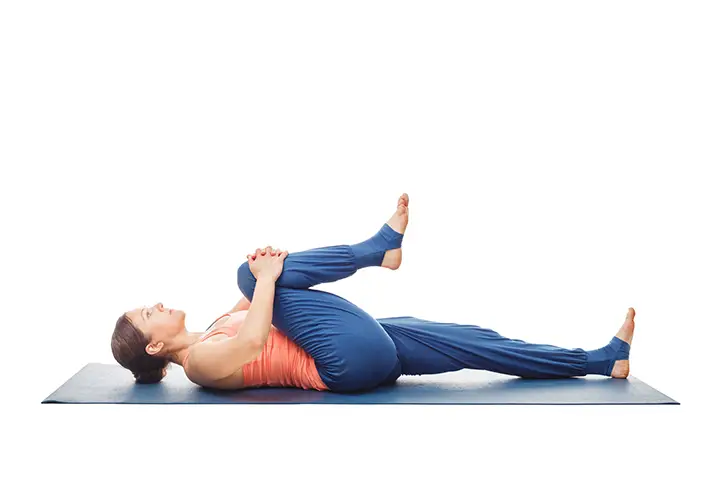
5. Apanasana
How to Do Apanasana:
- Start by resting on your back and place your spine in a mid-position.
- Bend your left knee towards the chest then cross your fingers on your shin.
- Straighten the right leg and bend it backward.
- Hug your left knee towards the armpit.
- On every inhale, feel the belly pressing against your thighs, and drawing away as you exhale.
Benefits of Apanasana Pose: Apanasana pose stabilizes and stretches both pelvis and the lower back, reducing lower back pain. It also helps your body in expelling toxins and wastes.
[ Read: Yoga for Thyroid Problems ]
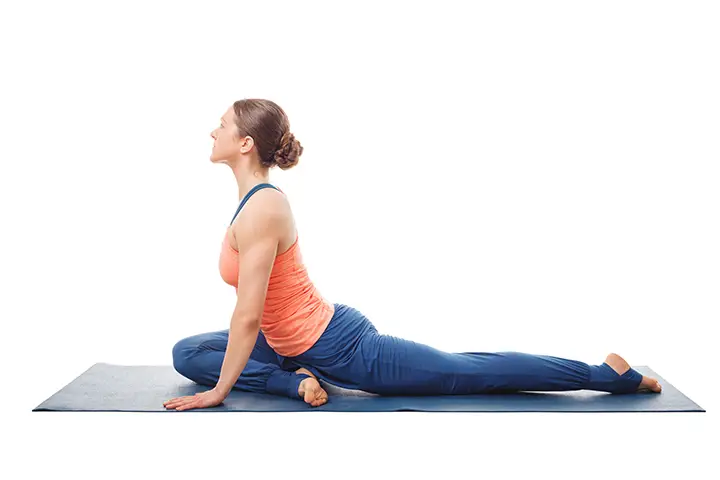
6. Pigeon Pose
How to do Pigeon Pose:
- Start by lying on your back on the floor, and cross the left foot over the right Quad. Then, bend the right knee.
- Pull the back of the right leg and draw it towards the chest.
- After reaching a comfortable stretch, hold the pose for two or three minutes.
- Change the position and repeat with the other leg.
Benefits of Pigeon Pose: The pigeon pose is helpful in stretching your butt, hips, and inner thighs. It also stretches muscle on the lower back, relieving lower back pain.
[ Read: Yoga Poses To Boost Your Energy ]
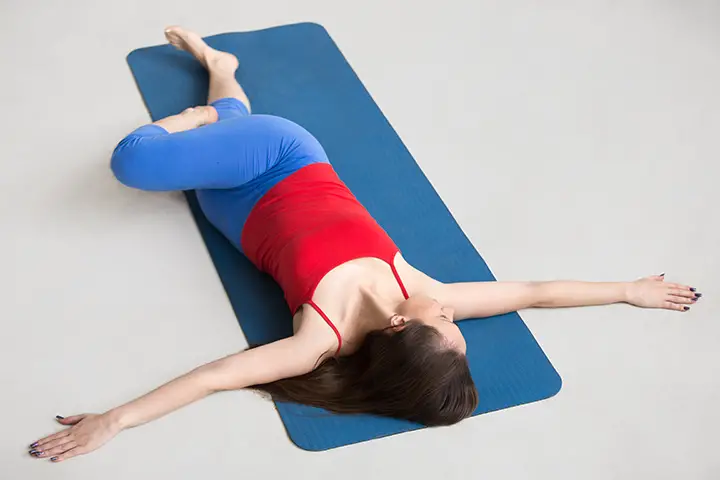
7. Supine Twist
How to Do Supine Twist:
- Rest on your back on the floor and place your arms in a T-shape.
- Hug your knees toward the chest.
- Then, move both of the knees on one side while you twist the upper body in the opposite direction.
- Try keeping your hips and knees in line as you move them towards the floor.
- Also, keep the chest straight up to the ceiling.
- Hold this spine twist pose for up to three minutes, then repeat on the opposite direction.
Benefits of Supine Twist: A spine twist offers an excellent tension reliever on your back, especially your back pain. It stretches your back, relieving pain on your muscles.
These yoga poses are excellent ways to relieve lower back pain. Taking care of your lower back is essential as it supports your whole torso. Include yoga exercises in your daily workout routine to eradicate back pain problems.
You Might Also Like:
- Why Do I Have Back Pain And Nausea?
- Pregnancy Back Massage: How To Do It, Benefits And Precautions
- Unlock Your Spine: 6 Best Yoga Poses to Improve Back Flexibility
- The 10 Best Foods That Help Reduce Back Pain
- Yoga for Upper Back Pain: 5 Best Yoga Poses to Relieve Upper Back Pain
- Yoga Poses to Improve Your Sex Life
- 5 Best Yoga Poses for Healthy Liver
- Yoga for Thyroid – 7 Best Poses to Control Thyroid
- 8 Yoga Poses to Detox Your Body
- Yoga for PCOS – 6 Effective Poses to Treat PCOS


