Important: This article is for informational purposes only. Please read our full disclaimer for more details.
Technology has advanced at an astonishing rate. While making our lives easier, the emerging technology has given us the gift of sedentary lifestyles. Sitting on a desk for long hours makes our body weaker and inflexible. Can we do something to keep our bodies flexible and young? You might ask. “Yoga Asanas” Sounds simple.Right?
Indeed, Yoga Asanas are simple poses which you can perform at your workplace, home, or gym. Not only they help you maintain the flexibility, but also regulate your breathing system. As they say one important thing about flexibility — Don’t use it, You’ll lose it.
You can perform the yoga poses whenever you feel stiff, achy, mentally or physically spent. It’s the ultimate dose of your daily rejuvenation. Furthermore, doing yoga poses regularly will allow you to generate power, move fast, lift heavy objects, and jump high.
In this article, you will learn 8 effective yoga poses for tight hips. By performing these easy stretches thrice or four times a week will massage, open, and lubricate the hips for maximum comfort, and ultimate transformation.
[ Read: Morning Yoga Poses to Start Your Day ]
8 Yoga Poses for Tight Hips
1. High Lunge Pose (Utthita Ashwa Sanchalanasana)
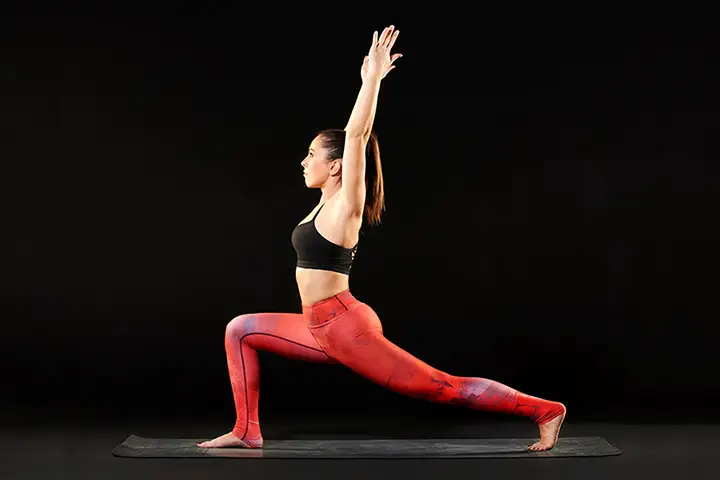
Researchers have proven the enormous benefits of yoga asanas. From building stamina to relieving constipation and indigestion, the High lunge pose has numerous health benefits.
This is how you do it:
- Start in a standing forward bend position with the fingers on the floor beside the feet.
- Step the right foot far back while exhaling. Rest on the ball of the right foot.
- Lift the arms and torso, reaching the hands toward the sky, while inhaling. Align the front knee over the ankle and bring the torso vertical.
- Hold it there and take 5-6 breaths and return to the starting position.
Recommended Reps: Repeat the movement 5 times with proper breathing.
[ Read: Yoga Poses for Beginners ]
2. Low Lunge Pose (Anjaneyasana)
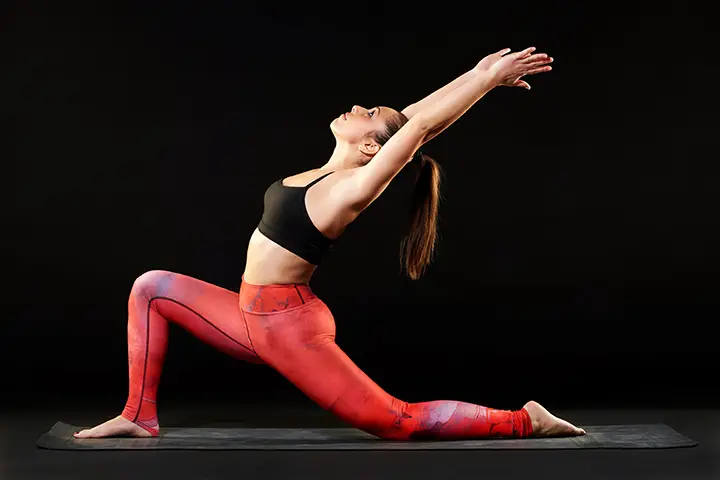
This asana is excellent in activating the functioning of your thyroid glands. The things and groins are stretched to the maximum while facilitating the greater range of motion.
This is how you do it:
- Start in Adho Mukha Svanasana.
- As you exhale, step your right foot forward, between your hands. Now, lower your left knee to the floor, sliding the foot back slowly until you feel a nice stretch in the left hip and thigh.
- Keep the hips low and maintain the level with each other.
- As you inhale, involve your lower belly and lift your chest away from the thigh, sweeping the arms up alongside your ears.
- Look straight ahead or come into a gentle backbend with your gaze to your thumbs. As you exhale, lower your hands back down and step back to downward facing dog position.
Recommended Reps: Perform the movement for 8-10 times for full range stretch.
[ Read: Yoga Poses to Lose Belly Fat ]
3. Lizard Pose (Utthan Pristhasana)
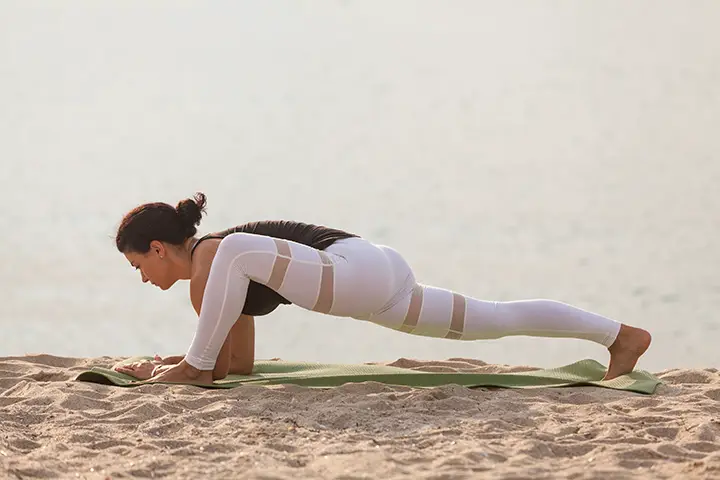
The name of the Asana might sound weird to you but it has numerous health benefits. If performed regularly and accurately, this asana can revitalize the body, boosts the metabolism and relieves stress and anxiety. Moreover, it also stretches the groin area, opens the hips, hamstrings and hip flexors, strengthens the legs and prepares the body for deeper hip openers.
This is how you do it:
- Start in downward facing dog position. Inhale.
- Exhale as you step your right foot to the outside of your right hand and make sure your foot comes all the way to the front of your mat so your toes are in line with your fingers. After that, your right knee should be bent and your toes must be pointed out above 45 degrees.
- Inhale as you bring your elbows to the floor with your forearms flat on your mat. Spread your palms out on the floor (use a block underneath the forearms here, if necessary)
- Make sure to keep your head in a neutral position, neither dropping it down nor crooking it up.
- Now, exhale and press into your left heel to keep your left leg active.
- Stay there for 5 deep breaths.
- When you’re ready to release from the pose, exhale deeply and straighten your arms so your wrists are under your shoulders.
- Finally, inhale and step back to downward dog position.
- Stay in your starting pose for several breaths.
- Repeat the steps for 8 times starting with your left leg forward to ensure the pose is performed equally on both sides.
[ Read: Yoga Pose for Weight Loss ]
4. Hero Pose
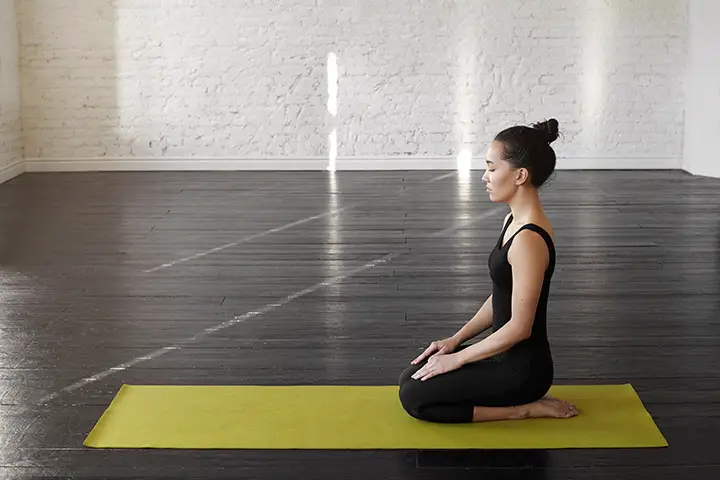
Hero pose is also known as “kneeling asana” in modern yoga. It is interesting to know about the various important benefits of this pose. From increasing flexibility in the knees and hips to toning the muscles in the arches of the feet, the Hero pose justifies its name completely.
This is how you do it:
- Kneel down on your mat with your knees together and keeping thighs perpendicular to the floor. Now, separate your feet slightly wider than hip width. Point your toes straight back and spread the balls of your feet from the big-toe side to the little-toe side. Ideally, all your toenails must touch the floor.
- While bending your knees a bit, lean forward and place your hands on your calves. Pull your calf muscles back away from your knees and roll them out. Lower your butts and sit on the floor. Usually, the inner sides of your calves should touch your outer thighs.
- Place your hands on your knees, catch the skin on your knees, and draw it up toward your thigh. Now, sit in this posture for 1-5 minutes.
- While extending your arms straight in front of you, bring your palms together and interlock your fingers. NOw, turn your palms forward, inhale, and raise your arms overhead. Use this extension along your arms to lengthen your sides upward. Press your shins and knees down and descend your inner groins. Hold for 30-60 seconds. Lower your arms, change the interlacing of your fingers, and repeat.
- To come out of the pose, lower your arms slowly, place your hands on the floor, and lift your butts. Raise one knee at a time, sliding each foot forward to straighten your leg.
Recommended Reps: Perform the action 5-6 times.
[ Read: Yoga Poses for Slim Waist ]
5. Supine Pigeon Pose (Supta Kapotasana)
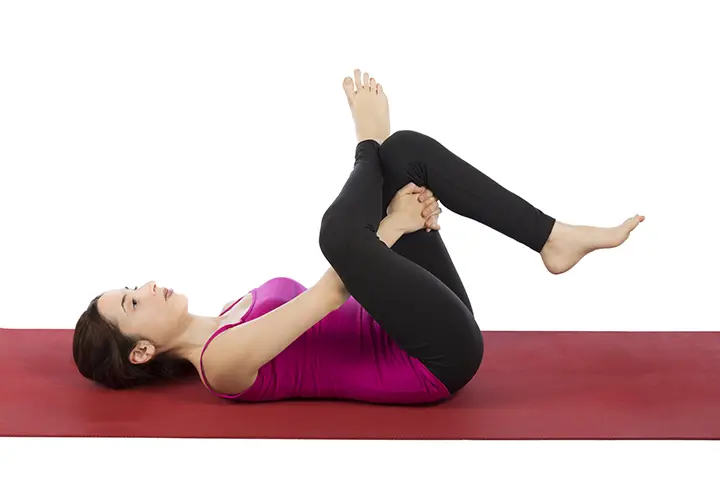
Supine pigeon pose is one of the well-known and used hip openers.
This is how you do it:
- Start by lying on your back.
- Bend your knees so both feet are flat on the floor as visible in the image.
- Bring your right ankle to top of left knee (ankle should be in line with femur bone).
- Flex both heels.
- Take your right hand split between your legs through the triangle opening between legs and hold onto your left thigh.
- Grab onto the outside of your left thigh with left hand.
- Relax head and neck pulling legs into chest.
- Bring left ankle in line with left knee.
- Your left calf should run parallel to the mat.
- Keep hips level on the floor.
- Stay here for five to six breaths then switch sides.
Recommended Reps: Perform the movement for 6-8 times.
[ Read: Yoga Poses to Beat Belly Bloat ]
6. Locust Pose (Salabhasana)
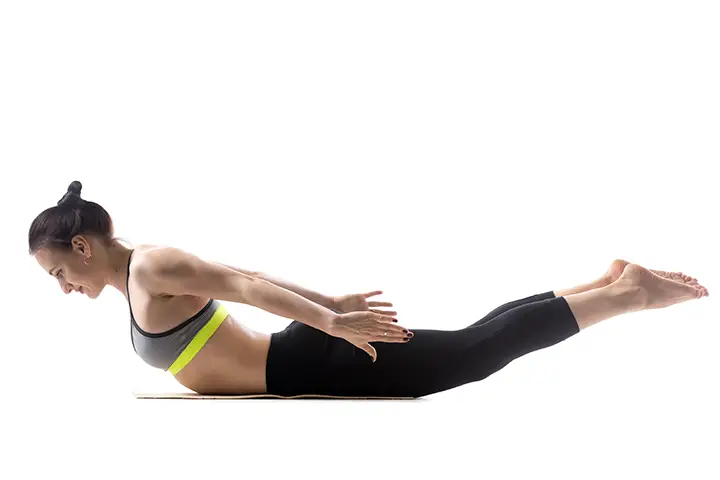
This pose is also known as “Grasshopper pose” for obvious reason. This pose invigorates the entire body, stimulates the internal organs, as well as enhances the circulation of blood. Not only back is toned and strengthened but this pose also encourages a healthy posture.
This is how you do it:
- Lie on your abdomen on the ground and place your hands by your side.
- As you inhale, lift your legs and upper torso.
- Using your inner thighs, lift your leg upwards without bending your knees. Your weight should rest on your lower ribs and abdomen.
- Hold the pose for a minute. Release.
Recommended Reps: Perform this movement 8-10 times.
[ Read: Yoga Poses for Hips ]
7. Triangle Pose
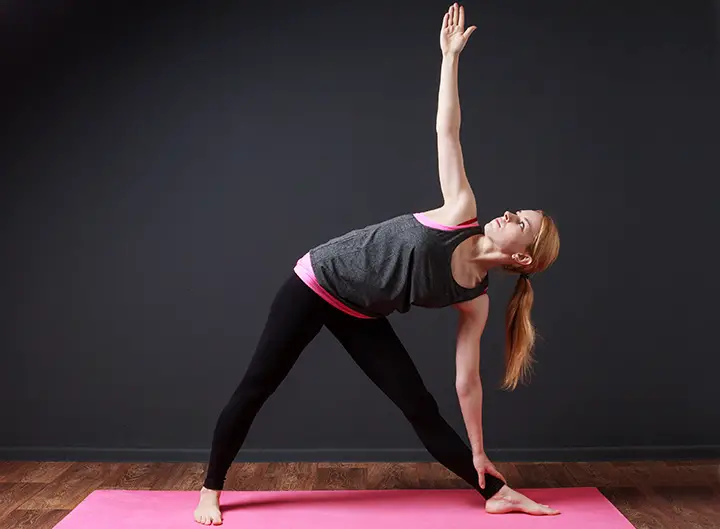
Triangle pose engages every part of the body, strengthens the core, opens the hips and shoulders and stretches the legs. It helps relieve lower back pain, stress and sluggish digestion.
This is how you do it:
- From a standing position with the legs 2 feet apart, turn the right toes to the right wall and the left toes inwards. Inhale and press the left hips out to the left as you slide both arms to the right parallel to the floor.
- Exhale and rotate your arms only, raising the left arm up and resting the right hand against the right leg, with the palms facing forward.
- Press into the feet, pull up the knee caps. Reach the fingertips away from each other, bringing the arms into one straight line with the shoulders stacked on top of each other. Press the left hip forward and the right hip backwards.
- Breathe and hold for 3-6 breaths.
- To release: inhale and reach the raised hand up towards the ceiling as you press down into the feet using the whole body to lift back into 5 pointed stars.
- Repeat on the other side.
Recommended Reps: Perform the movement both sides for 5-6 times.
[ Read: Yoga Poses to Relieve Knee Pain ]
8. Bridge Pose (Setu Bandha Sarvangasana)
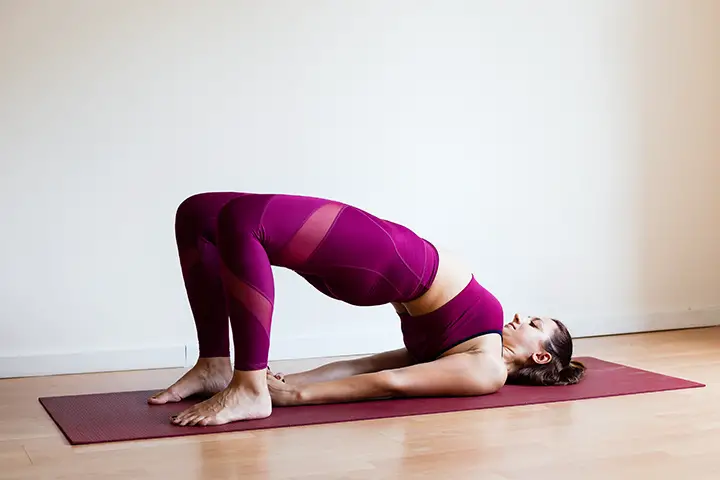
Bridge pose helps you stretch out the front body – fronts of the thighs, hips, abdomen and chest.
This is how you do it:
- Lying on your back, place your feet flat on the floor, a comfortable distance away from the hips.
- Place your arms next to your ribs. You could either bend your elbows 90 degrees so that your fingers are pointing to the ceiling or hold onto the outer edges of your mat.
- While inhaling, press the back of your shoulders and your feet into the floor and lift your hips up.
- Press the inner feet down and keep the knees from spreading out wide, by engaging the inner thighs.
- Lengthen your tailbone, slide your shoulder blades down your back and keep your neck neutral
- You can clasp your hands behind your back
- Stay there for 5 to 16 breaths
- To come out of the pose, release the arms and roll your spine down on an out-breath.
Recommended Reps: Perform the movement for 8-9 times both sides.
We would urge you to take time out from your daily schedule and perform 3-4 asanas from the list or you can do it all to gain maximum flexibility. These asanas have worked tremendously for millions of people and they will work well for you as well. Don’t forget to recommend this list to your friends and family. Spread more love.
You Might Also Like:
- Top 5 Yoga Poses to Tone Your Legs
- 7 Best Yoga Poses for Tight Hamstrings
- Stretching Into Relief: 8 Best Yoga Poses for Tight Calves
- Stretch It Out: 7 Yoga Poses for Tight Muscles You’ll Love
- 7 Must-Try Yoga Poses to Loosen Up Tight Quads
- 5 Effective Yoga Poses to Strengthen Your Pelvic Floor
- 7 Easy Yoga Poses You Should Do Every Day For Better Health
- Yoga Poses to Tighten Sagging Breasts
- Yoga for Constipation: 6 Best Yoga Asanas to Relieve Constipation
- Yoga for Immunity: 5 Effective Yoga Poses To Boost Your Immune System
- 6 Simple Yoga Poses to Increase Height
- Yoga for Hips – 10 Best Yoga Poses to Keep Your Hips Tight and Strong
- Yoga for Slim Waist: 7 Best Yoga Poses To Slim Your Waist