Important: This article is for informational purposes only. Please read our full disclaimer for more details.
There is no such thing called “Spot Reduction”. However, it’s still important to strengthen and tone the muscles in that area of the body by putting extra resistance onto that muscle group. Yoga, combined with a healthy diet and cardio exercise, burns calories and builds muscles, which helps reduce overall fat. Run through any or all of these moves whenever you feel achy, or mentally or physically spent. As with any exercise, go deeper into the move if it feels good, but back off if you feel even a hint of pain or acute discomfort.
Perform a series of yoga poses listed in this article that will strengthen your upper back, lower back and shoulders.
7 Simple Yoga Poses to Get Rid of Back Fat
1. Twisted Chair Pose
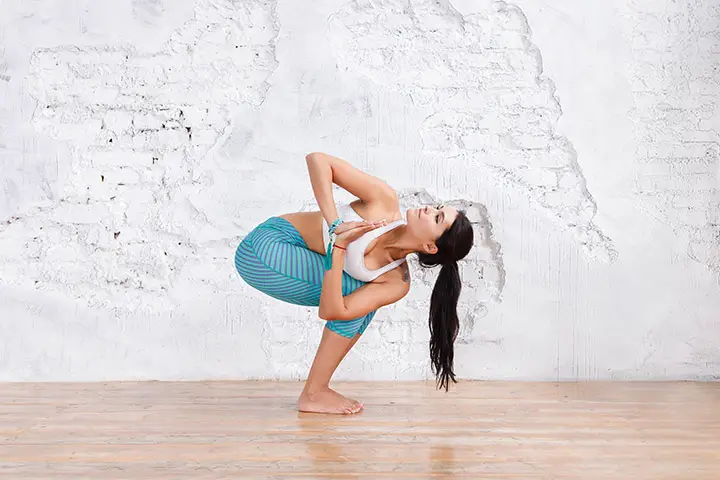
This pose is quite similar to the chair pose but with a little twist. Moreover, a squeeze and release effect on your digestive system and internal organs so they help promote detoxification. Furthermore, great way to strengthen and lengthen the leg muscles, this challenging posture also lengthens and improves mobility in the spine.
This is how you do it:
- Begin standing with big toes together, outer edges of feet parallel.
- Now, bend your knees and sink your hips back like you’re sitting down in an imaginary chair. Reach your arms high, framing your face. This is a chair pose.
- Lengthen through your spine while inhaling. On your exhale, take your hands together at the centre of your chest in a prayer position.
- Now, twist to the right, placing your left elbow outside of your right thigh, looking up over your right shoulder. Come back to chair while inhaling, and on your next exhale do the same twist to the left.
- Come back to chair on your next breath.
- Repeat this, linking your breath to your movement for 1 minute at a quick, steady pace but maintain the perfect form.
[ Read: Yoga Poses to Reduce Belly Fat ]
2. Warrior 3 Pose
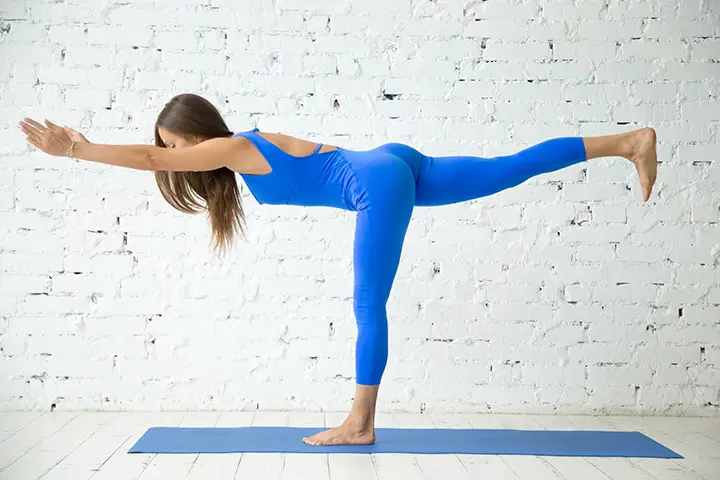
The warrior pose explains its function automatically. Not only it activates the legs and core, but also provides encouraging feelings of confidence, determination and willpower.
This is how you do it:
- Starting in a High Lunge with your right foot forward, arms on either side of the ears, shoulders distance apart and palms touching.
- Activate your core by lifting your pelvic floor muscles and drawing the lower belly in and up.
- As you exhale, fold from the hips lowering your torso & arms a little so that they are diagonal with the floor and just focus on a point on the floor just in front of your mat.
- While inhaling, root down through the front foot and put your weight forwards, raising the back foot from the floor.
- Straighten the standing leg as you bring your upper body and left leg parallel to the floor. Grip the toes down to the floor.
- Engage your standing leg, without locking the knee and keep your hips in a equal level.
- Extend out through the raised foot and the hands.
- Stay for 5-8 breaths.
- To come out of the pose, bend the standing leg as you exhale and step back into High Lunge, with total control. Step forward to Mountain Pose while you inhale.
- Repeat on the other side.
Recommended Reps: Perform the movement for 8-10 times.
[ Read: Best Yoga Poses for Weight Loss ]
3. Half Moon Pose
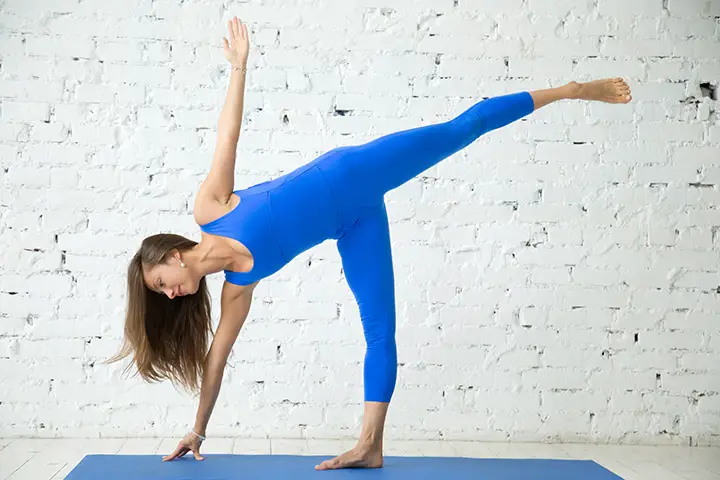
Embrace the leg and ankle strength as you seek stability and extend into this balancing pose, Half Moon Pose. This pose opens the hips and relieves the sore muscles after a long tiring day of work. This pose improves balance, focus, concentration, and confidence.
This is how you do it:
- Begin in extended triangle pose with your right foot forward. Bend your right knee and place your right fingers on the ground about 10 to 16 inches in front of your foot.
- Shift your weight into your right foot as you draw your left foot forward along the floor. Your right kneecap should be facing straight ahead, not inward.
- Lift your left foot off the floor, pressing through the heel so that your foot stays flexed. Lengthen from your tailbone to your lifted heel.
- Square your chest toward the side of your mat that you are facing.
- Keep your weights primarily in your right leg using your bottom hand as little as possible.
- Adjust your gaze slowly, either looking down, straight ahead, or up at the left hand. Work to stay in the pose for up to 60 seconds before lowering the left leg back to the floor and returning to extended triangle. Repeat on the other side.
- Perform this movement for 5-6 times in both directions.
[ Read: Best Yoga Poses To Slim Your Waist ]
4. Triangle Pose
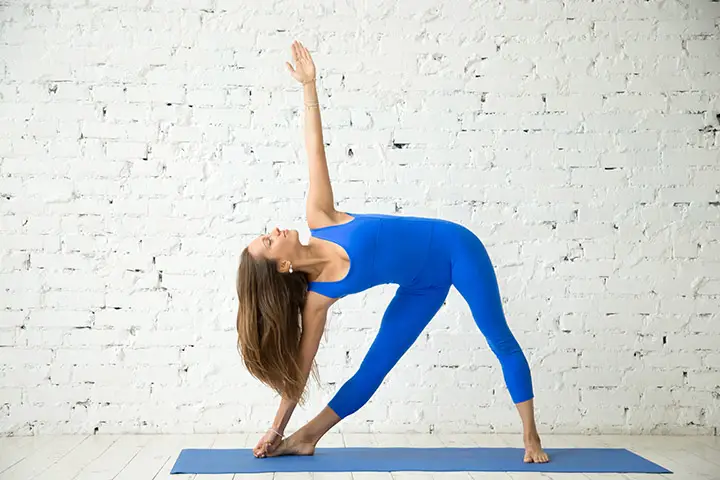
Triangle pose engages every part of the body, strengthens the core, opens the hips and shoulders and stretches the legs. It helps relieve lower back pain, stress and sluggish digestion.
This is how you do it:
- From a standing position with the legs 2 feet apart, turn the right toes to the right wall and the left toes inwards. Inhale and press the left hips out to the left as you slide both arms to the right parallel to the floor.
- Exhale and rotate your arms only, raising the left arm up and resting the right hand against the right leg, with the palms facing forward.
- Press into the feet, pull up the knee caps. Reach the fingertips away from each other, bringing the arms into one straight line with the shoulders stacked on top of each other. Press the left hip forward and the right hip backwards.
- Breathe and hold for 3-6 breaths.
- To release: inhale and reach the raised hand up towards the ceiling as you press down into the feet using the whole body to lift back into 5 pointed stars.
- Repeat on the other side.
Recommended Reps: Perform the movement both sides for 5-6 times.
[ Read: Fat Burning Yoga Poses ]
5. Side Plank Pose
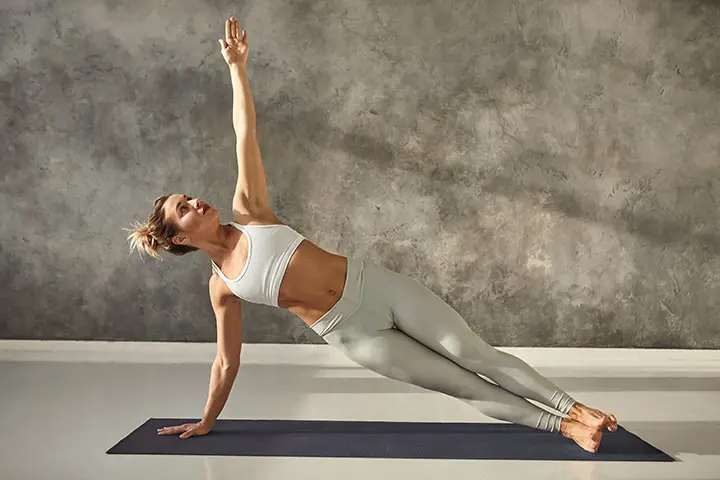
A powerful arm and wrist blaster, Side Plank takes it to the next level. As the name suggests, this pose is similar to side plank core exercise. Not only it strengthens your wrists, forearms, shoulders, and spine, but also it increases the flexibility in the wrists. It also improves the sense of balance.
This is how you do it:
- Sit on the mat in a sugar leader stance. Keep your fingertips pointed directly forward.
- Bend the elbow so you have a little elbow crease. This will help you to lean the weight over your index knuckle and finger.
- From there, the shoulder can roll back towards the ear. Them the arm can straighten again.
- Now, sit one foot, set the other foot in front. And, just push the weight into the front foot. Make sure that shoulders are right over that knuckle index finger.
- And the fingertips of another hands reached up to the ceiling. Now, lift the front foot and set it on top of the other foot. Stay there for 5-6 breaths and come back by bringing your foot on the floor.
Recommended Reps: Perform this movement 3-4 times.
[ Read: Yoga Poses for Strong Core ]
6. Bow Pose
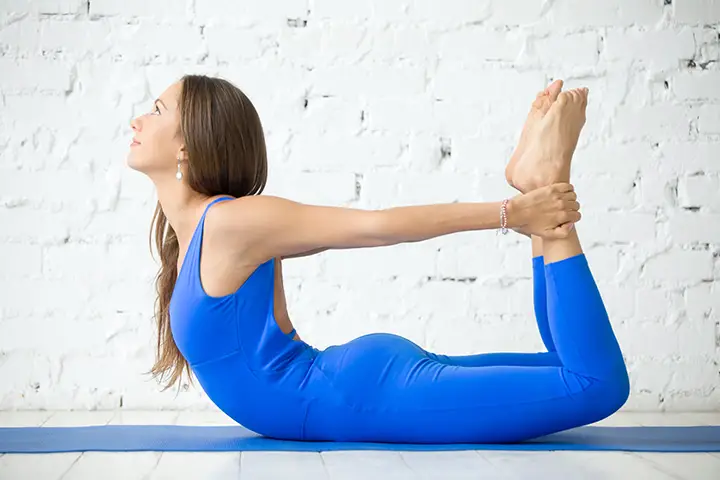
The pose name is self-explanatory. While doing this pose, you stretch the entire front of the body, ankles, thighs, and groins, abdomen and chest, and throat; it looks like an archer’s bow. It also stimulates the organs of the abdomen and neck.
This is how you do it:
- Begin on the belly by lying on the mat. Now, reach back for the pinky side of the foot by grabbing tops of your feet and relaxing the chin back down onto the floor holding the feet.
- Now, as you inhale, your body will rise up, and with your exhale, you will kick into your feet and lift your gaze. Stay there for 5-6 breaths.
- To come out of the pose, release back the energy by bringing your chin down and swim your hands forward and rest.
Recommended Reps: Perform the complete movement for 8-10 times with time breaks of 15 seconds.
[ Read: Yoga Poses For Toned Arms ]
7. Locust Pose
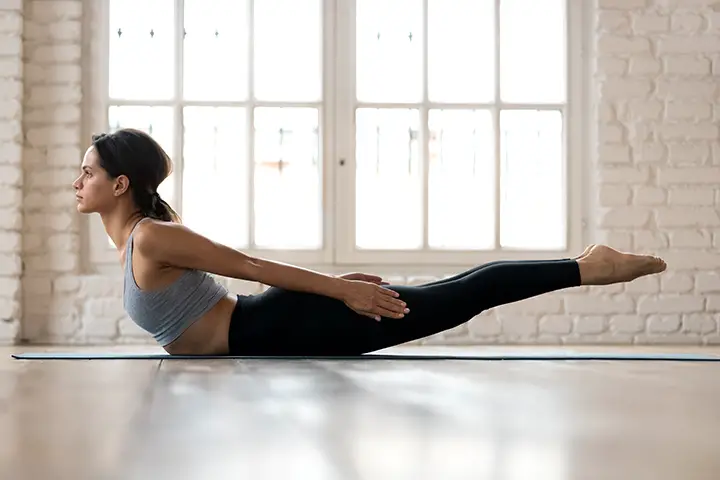
This pose is also known as “Grasshopper pose” for obvious reason. This pose invigorates the entire body, stimulates the internal organs, as well as enhances the circulation of blood. Not only back is toned and strengthened but this pose also encourages a healthy posture.
This is how you do it:
- Lie on your abdomen on the ground and place your hands by your side.
- As you inhale, lift your legs and upper torso.
- Using your inner thighs, lift your leg upwards without bending your knees. Your weight should rest on your lower ribs and abdomen.
- Hold the pose for a minute. Release.
Recommended Reps: Perform this movement 8-10 times.
Consistently doing these poses will help you get rid of chubby fat from your back. Pick any 3 – 5 poses from the list mentioned above and bring into your regular routine. Not only you will feel energetic and replenished but you will also find the transformation in your body.
You Might Also Like:
- 6 Best Exercises to Get Rid of Bra Fat
- How to Lose Arm Fat?
- Best Kettlebell Workouts to Blast Belly Fat
- The 6 Best Plank Exercises to Lose Belly Fat
- How to Lose Belly Fat After 40 – 8 Easy Ways
- Flatten Your Belly After 50: Effective Exercises to Shed Fat
- How To Lose Belly Fat In A Week?
- Top 5 Exercises to Lose Thigh Fat
- Slim Your Thighs with 5 Easy Yoga Poses
- 6 Best Yoga Poses to Reduce Arm Fat and Build Muscle
- Yoga for Weight Loss – 19 Best Poses to Burn Fat Quickly and Easily
- Top 7 Fat Burning Yoga Poses
- Back Fat Exercises – 8 Best Workouts To Reduce Back Fat For Women
- How to Get Rid of Back Fat?
- 8 Yoga Poses to Detox Your Body
- Yoga Poses for Strong Abs