Important: This article is for informational purposes only. Please read our full disclaimer for more details.
Drying curly hair can feel like walking a tightrope—do it right, and you’re rewarded with bouncy, defined curls. Do it wrong, and you’re stuck with frizz, shrinkage, or uneven texture. If you’ve sworn off diffusing because your results never come out quite right, it’s time to revisit your technique.
Article Contains
- Starting at the Ends? That’s Your First Mistake
- Touching Your Hair While It’s Wet—Please Stop
- Staying Upside Down the Entire Time? Not Helping
- Diffusing Too Soon—Let Your Curls Set First
- Using the Wrong Technique (Hover First, Then Scrunch)
- Believing the Cold Air Myth
- Not Letting Hair Fully Dry Before Scrunching Out the Cast

Here are the most common mistakes you’re making when diffusing curly hair—and exactly how to fix them for flawless curls every wash day.

1. Starting at the Ends? That’s Your First Mistake
What You’re Doing
Most curlies instinctively begin diffusing at the ends. While it may seem harmless, it sets the stage for uneven drying and disruption of the curl pattern.
Why It’s a Problem
- Ends dry too fast, leaving roots wet
- Increases shrinkage
- Promotes frizz and uneven definition
How to Fix It
Always start at the roots, not the ends. Hover the diffuser around your scalp to partially dry your roots before touching the ends. This helps your curls “set” properly, allowing for better volume and less frizz.
Pro Tip
Repeat this mantra: Leave the ends for the end.
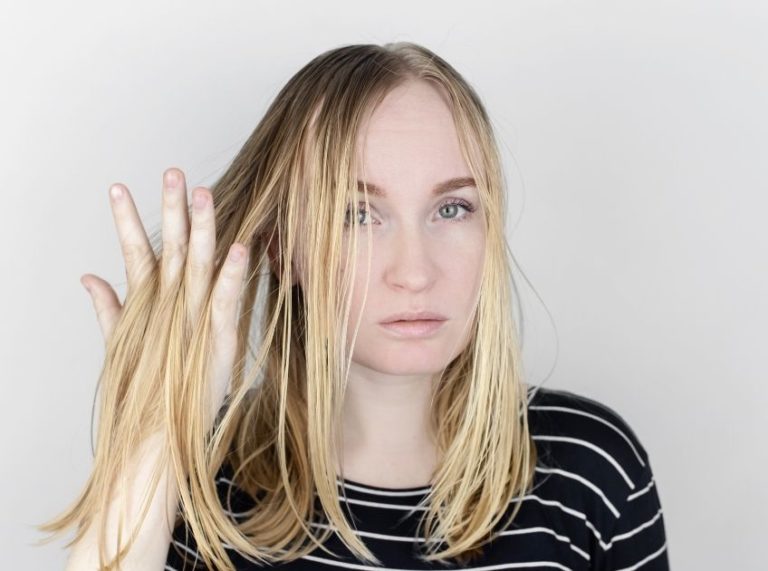
2. Touching Your Hair While It’s Wet—Please Stop
What You’re Doing
Running your fingers through your curls while drying seems innocent, but it’s quietly ruining your definition.
Why It’s a Problem
- Transfers product and moisture to your hands
- Breaks the gel cast before it forms
- Causes unnecessary frizz
How to Fix It
Keep your hands off your curls until they’ve mostly dried and formed a cast. This allows your curl shape to lock in without disruption.
3. Staying Upside Down the Entire Time? Not Helping
What You’re Doing
Drying your entire head upside down feels like it gives volume, but it also leads to awkward root placement and flat crowns.
Why It’s a Problem
- Roots may set in unnatural directions
- Hard to restyle later
- Causes uneven volume distribution
How to Fix It
Alternate your head position while drying. Spend some time upside down, then side to side, and upright. This helps your roots stay mobile and adds balanced volume.
4. Diffusing Too Soon—Let Your Curls Set First
What You’re Doing
Jumping in with the diffuser right after applying product can ruin the shape you worked so hard to define.
Why It’s a Problem
- Curls haven’t set, so they lose form
- Encourages frizz
- Weakens hold from the stylers
How to Fix It
After styling, wait a few minutes. Let your curls start air-drying slightly or allow the gel/cream to form a light cast before you diffuse. Then, begin with a hover technique to preserve curl shape.
5. Using the Wrong Technique (Hover First, Then Scrunch)
What You’re Doing
Scrunching with the diffuser right away disturbs your natural curl pattern and increases frizz.
Why It’s a Problem
- Manipulates the curl shape too early
- Creates excessive shrinkage
- Encourages clumping in the wrong places
How to Fix It
Start by hovering your diffuser around your roots and crown without touching your curls. Once your hair is about 80% dry and the cast has formed, then you can scrunch to encourage volume and bounce.
6. Believing the Cold Air Myth
What You’re Doing
Thinking,g cool air “locks in” moisture.
Why It’s a Problem
- Slows down drying
- Doesn’t change how product sets
- May leave hair damp for too long
How to Fix It
Use medium or high heat and airflow to dry your hair efficiently. Heat helps the water evaporate faster, but doesn’t remove the product (like cream or gel) from your strands. Cool air can be used at the very end to set your style and reduce static, but it’s not essential.
7. Not Letting Hair Fully Dry Before Scrunching Out the Cast
What You’re Doing
Breaking the cast too early because you’re impatient.
Why It’s a Problem
- Reduces hold and longevity of your style
- Makes curls lose their structure
- Creates frizz
How to Fix It
Wait until your curls are completely dry before you scrunch out the cast. This ensures the shape is locked in, and you’ll enjoy longer-lasting definition and volume.
Frequently Asked Questions (FAQ’S)
Q: Can I diffuse every wash day?
A: Yes! Diffusing is safe as long as you use heat protectants and follow a low-manipulation method.
Q: Is air drying better than diffusing?
A: Both are great—air drying is gentler, but diffusing offers more volume and faster drying.
Q: Do I need a specific diffuser brand?
A: No, as long as your diffuser has vents and prongs, technique matters more than the brand.
Q: Should I use a leave-in conditioner before diffusing?
A: Definitely. Moisture-rich stylers help define and hold curls during the diffusing process.
Final Thoughts: Don’t Give Up on Diffusing
Diffusing is a game-changer for curly hair—but only if you know what not to do. By avoiding these common mistakes and embracing the right technique, you’ll start seeing soft, defined curls with bounce and shine.
Next Wash Day Challenge
Put these tips to the test and notice the difference. Whether you’re using a high-end Dyson or a basic blow-dryer, technique matters more than tools.